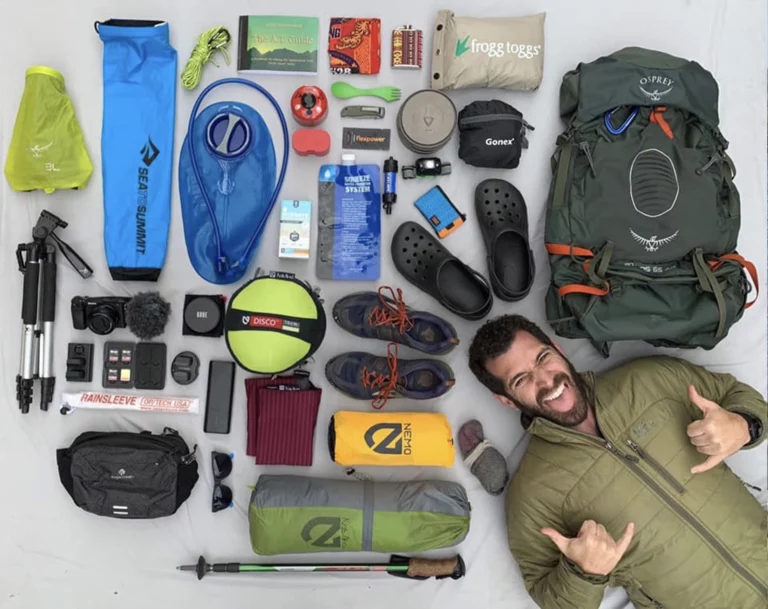
From packs to headlamps, here’s everything you need to get started backpacking.
Once you’ve purchased the essential gear, backpacking is a highly accessible recreational activity. It isn’t too technical, and starting with a short overnight trip is a simple progression from day hiking. The Big Three (tent, pack, sleep system) will be the biggest investment. I recommend buying lightweight, quality items instead of cheaper, heavier gear that won’t last as long. After those purchases, it’s mostly smaller items, including a water filter, headlamp, trekking poles, and a cookset.

I’ve used all of these items for multiple seasons. They aren’t the cheapest on the market, but you’re getting quality items and you’ll carry less weight. After a lot of trial and error (and money) spent on cheaper items only to replace them after one season, I’m a big believer in buying the right thing the first time.
These are my top recommendations for essential backpacking gear, and what to look for as you shop for each item.
Backpack
Hyperlite Mountain Gear 3400 Southwest Pack
At-a-Glance: 55 liters | 19 ounces | waterproof | internal frame
What to Look For: I recommend between 50-60 liters capacity, weighing no more than 2.5 pounds. Any larger and you’ll risk overpacking, and any smaller and you might not have enough space. It can be tempting to buy a heavy pack with all the bells and whistles, but some of those packs weigh up to five pounds empty, and if you throw too many pockets into a pack it just gets confusing. Stick with a simple pack that has enough external pockets for organizing and quick gear grabs, while still having support with a lightweight, internal frame and a comfortable hip belt for weight distribution.
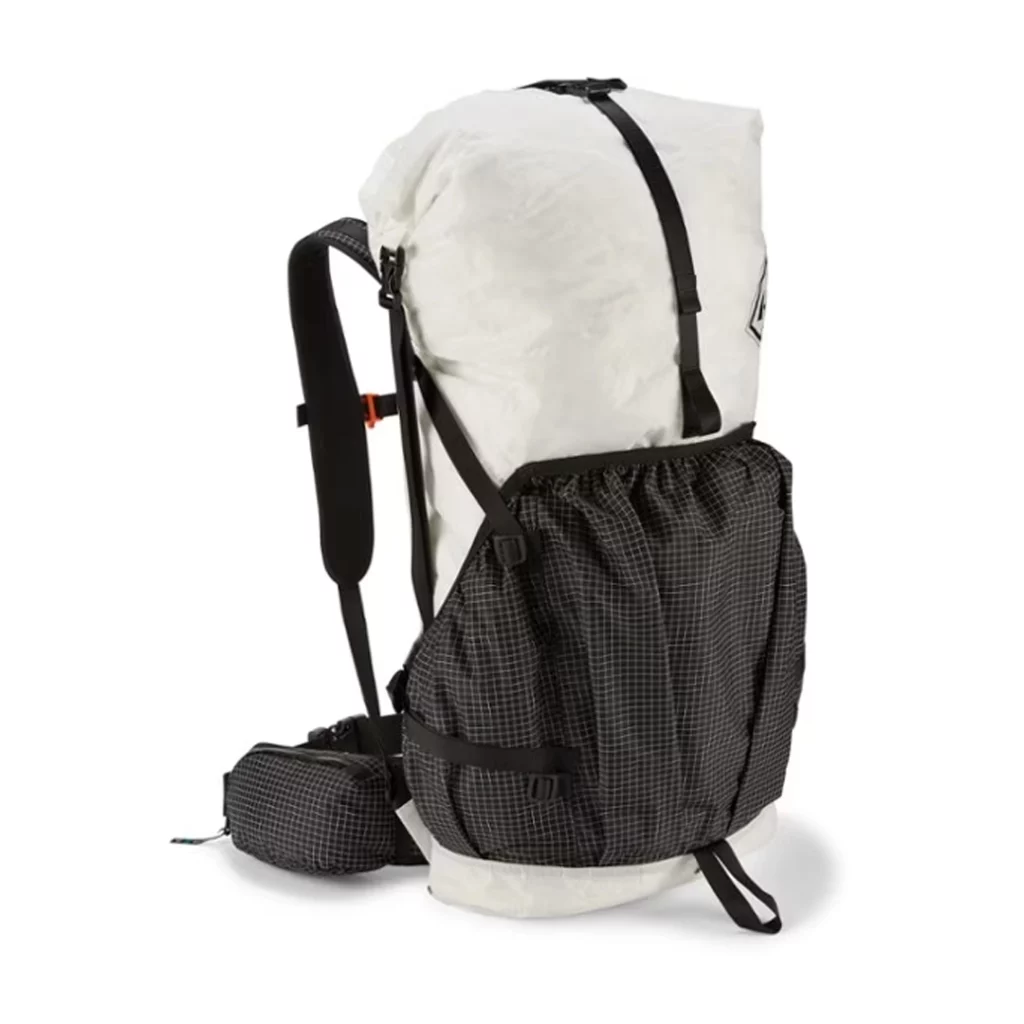
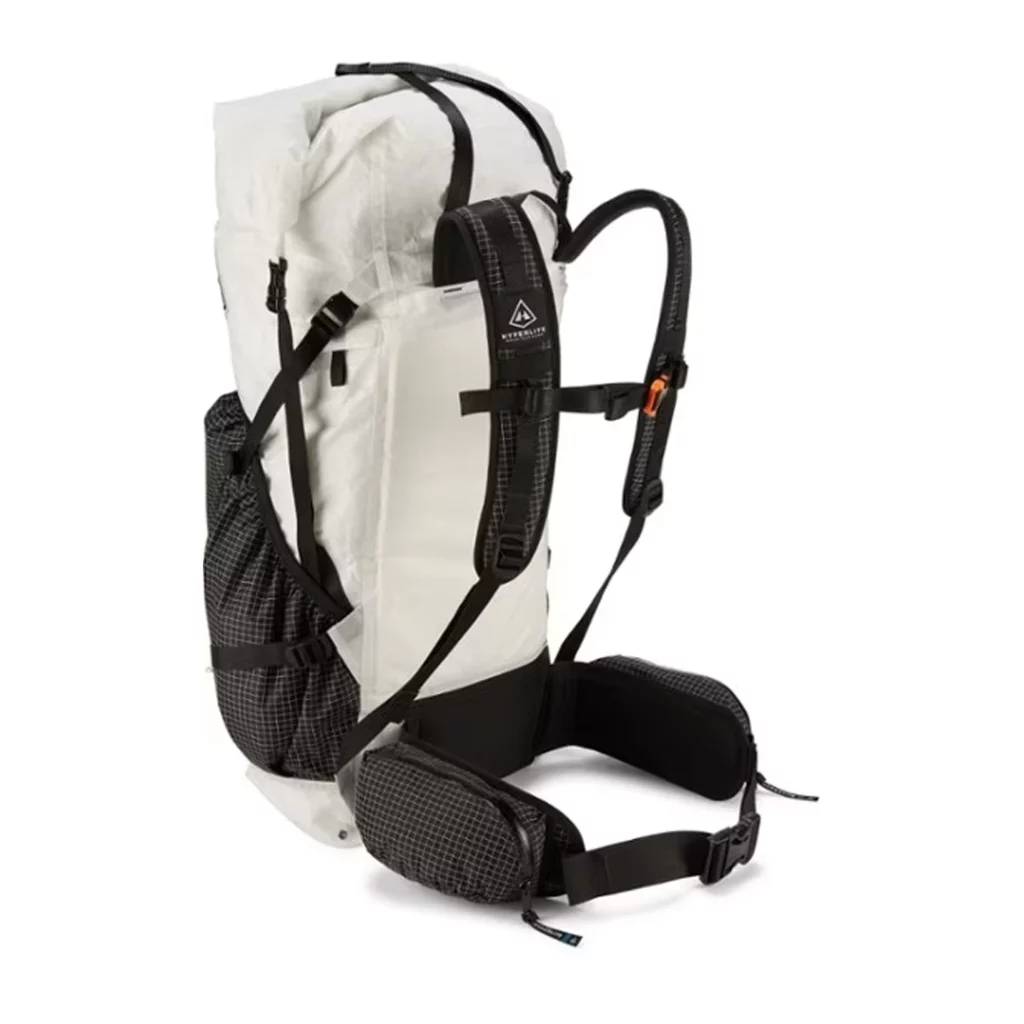


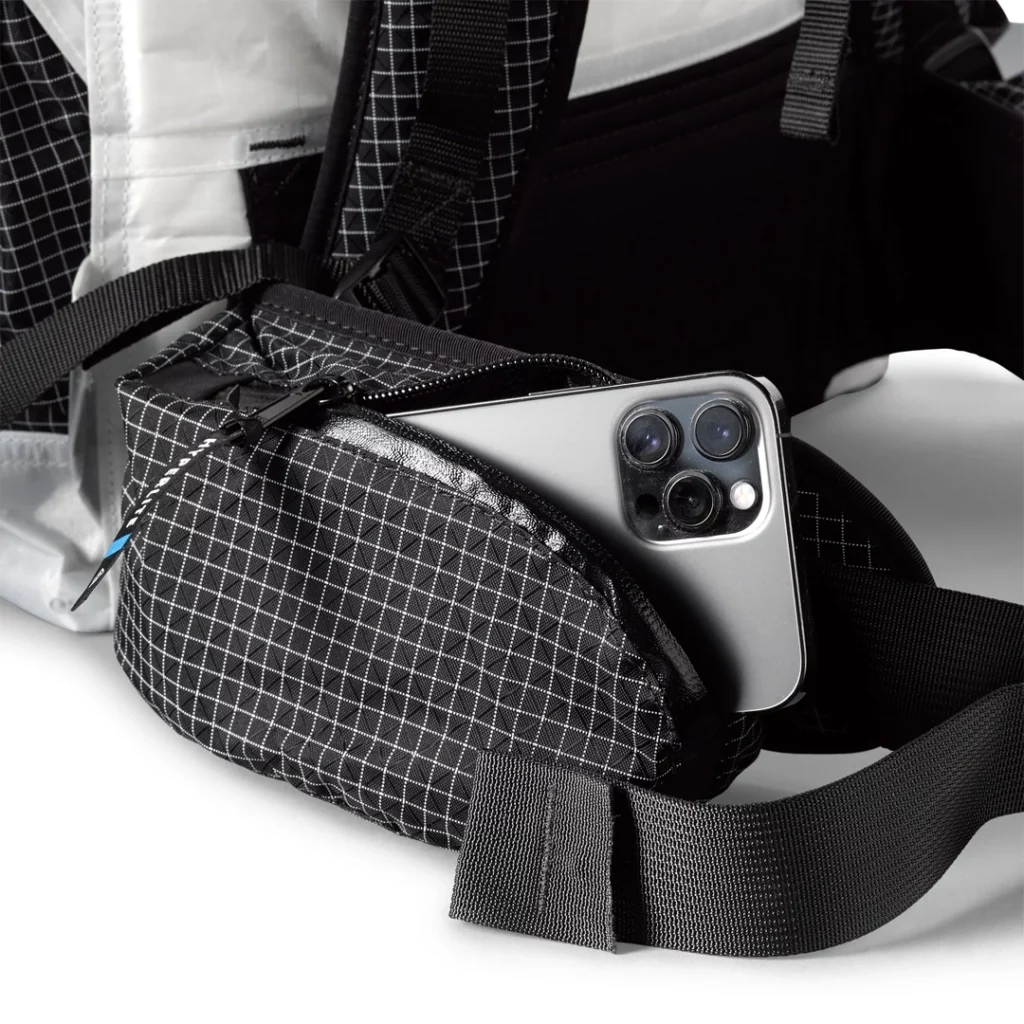
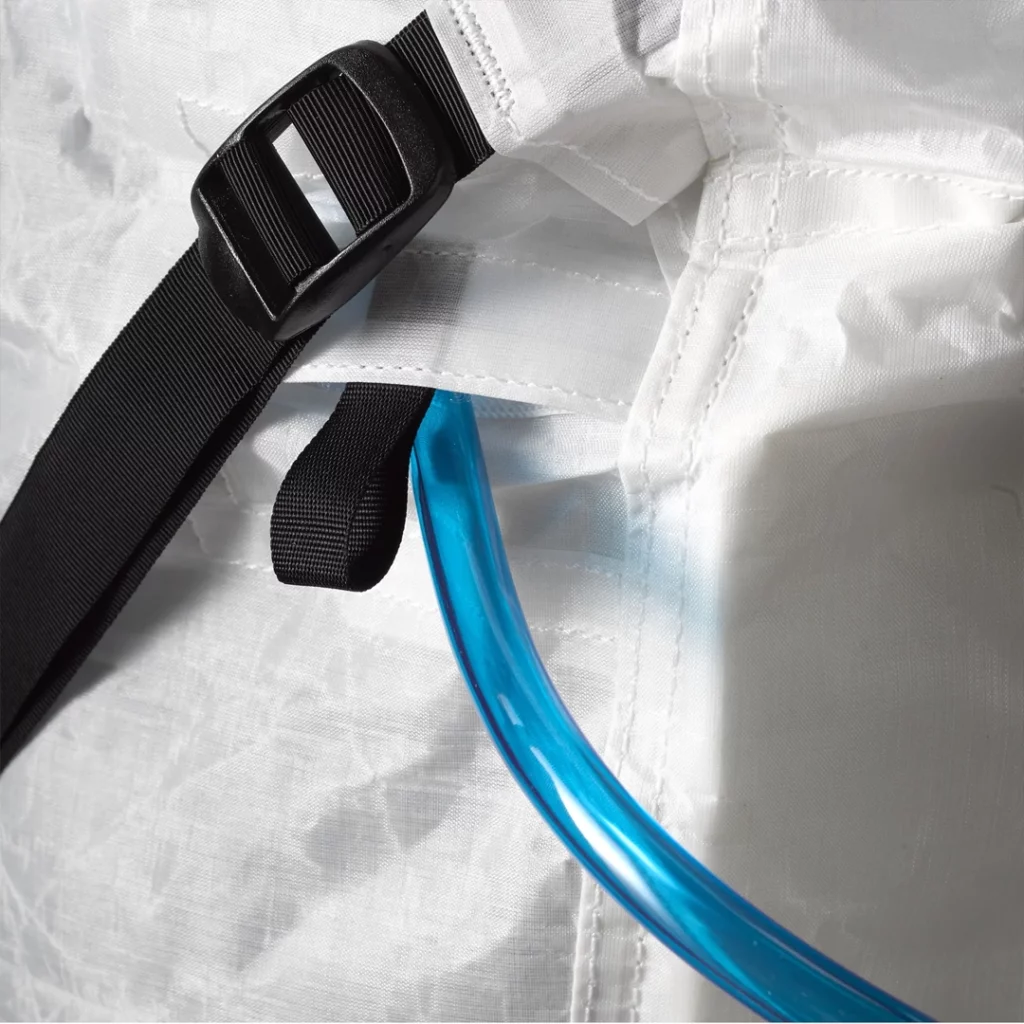
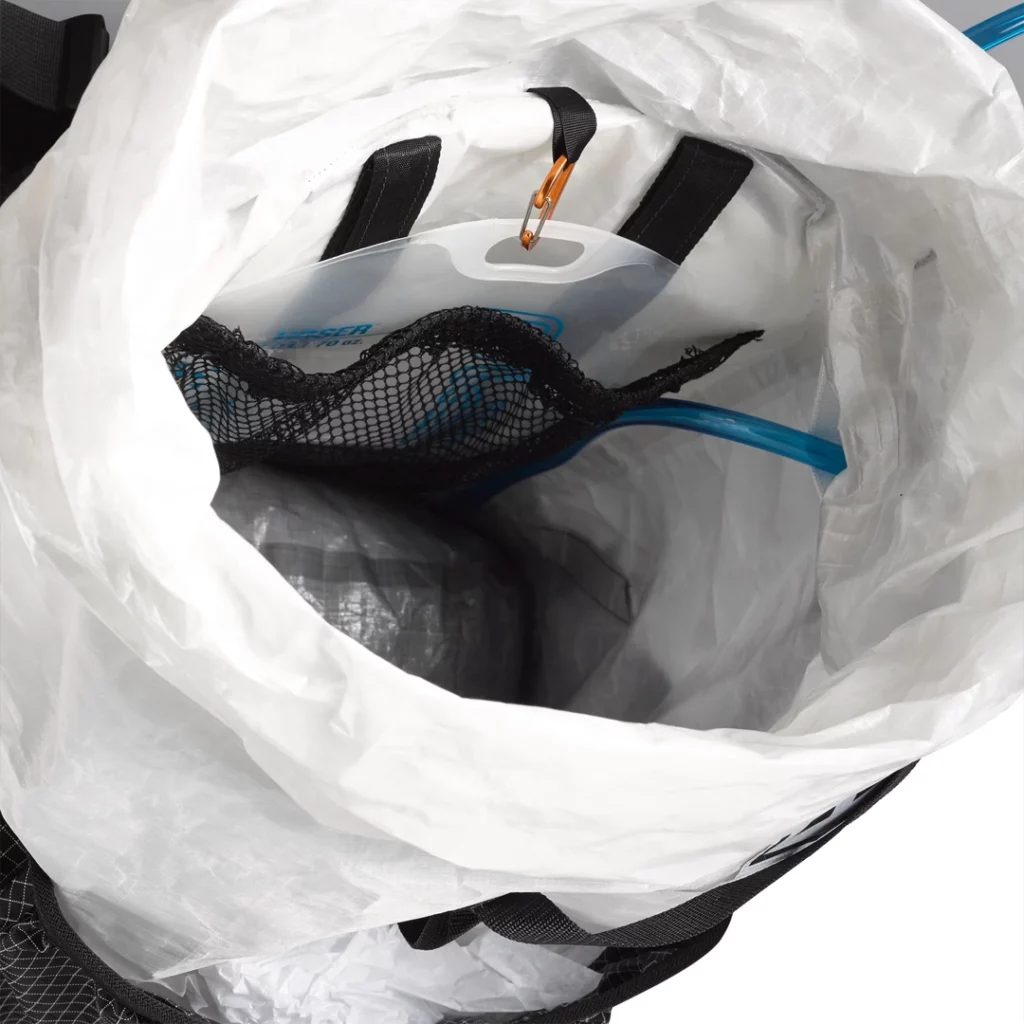
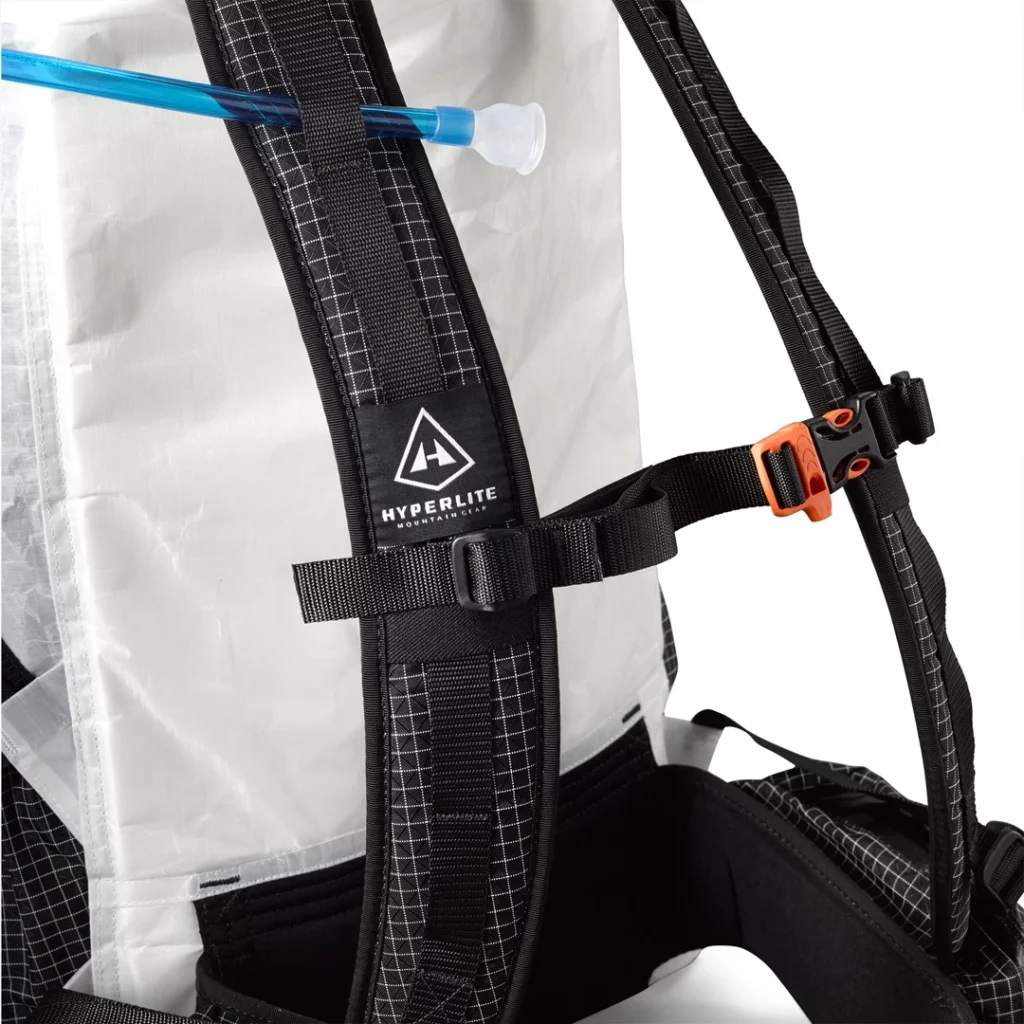
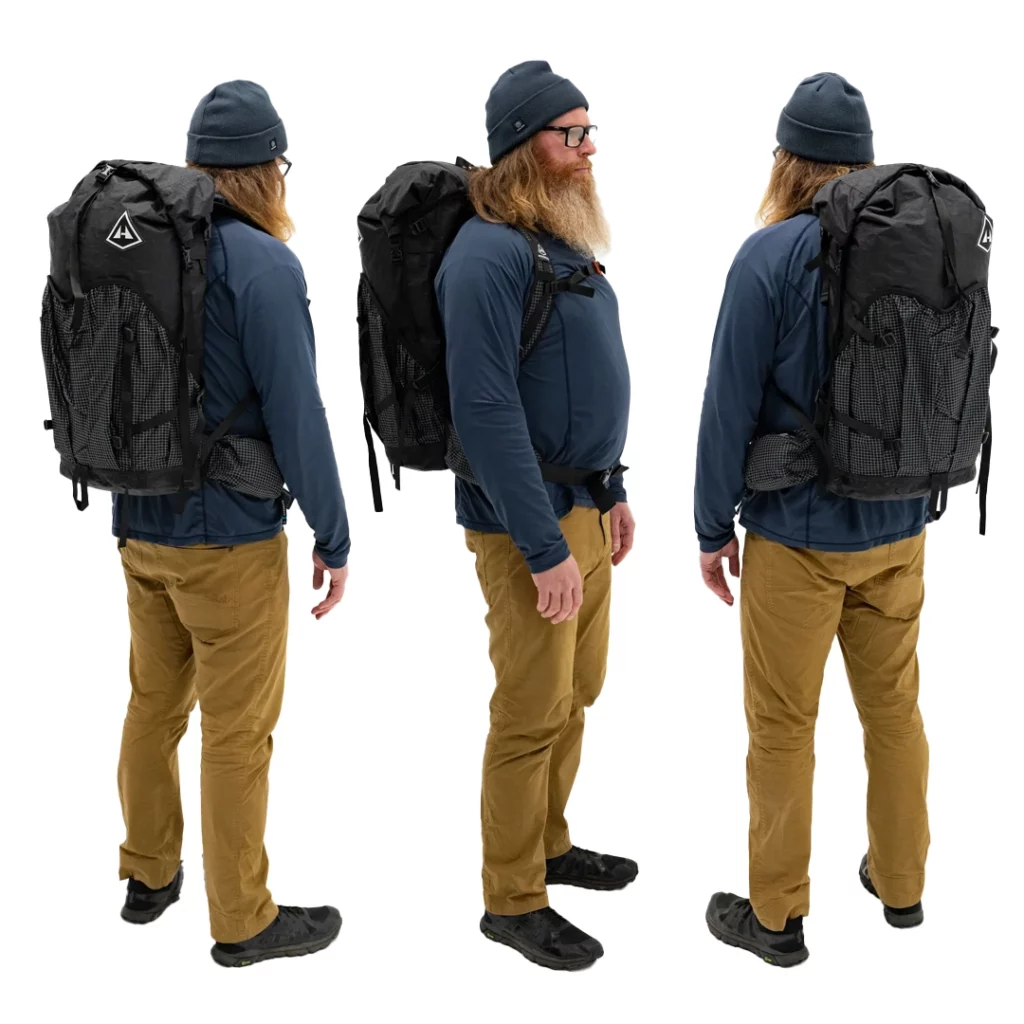
Why This Pack: The 3400 Southwest is one of Hyperlight Mountain Gear’s flagship packs. At 55 liters, it’s a full 15 liters larger than their 2400 Southwest model, but only a few ounces heavier. Unlike zip-style packs, this pack has a roll-top closure that compresses down as you eat through your food or if you have a smaller load, so you don’t have a lot of extra fabric flapping around. It’s made with super durable Dyneema Composite Fabric (DCF) which means it does cost more than a Cordura or nylon pack, but it’s entirely waterproof, abrasion-resistant, and has an incredible strength-to-weight ratio. I love this pack for the weight distribution, wide hip belts, generous hip-belt pockets, and large front pocket to stash easy-to-reach items.
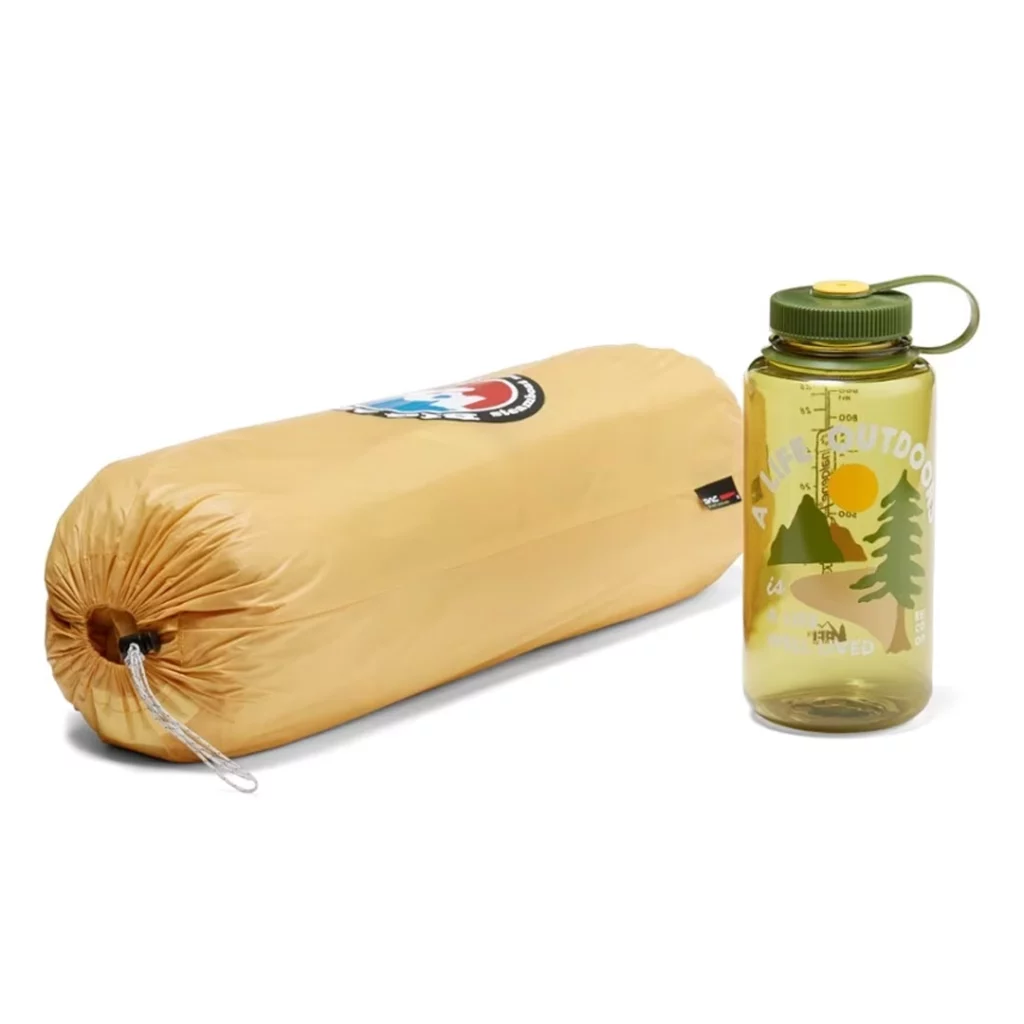
Tent
Big Agnes Tiger Wall 2
At-a-Glance: 2-person | 2.5 pounds | 2-door | semi-freestanding
What to Look For: If you’re buying one backpacking tent, a lightweight, two-person, double-wall tent is a great shelter option. A two-person tent is comfortable for two people, but a lightweight model isn’t too much for one person to carry. There’s a saying in the backpacking world that a “two-person tent is a one-person-plus-gear tent,” and I’ve found that to be true…But you still have the option of backpacking with a partner. Your best choice is a two-person tent under three pounds, with two doors and two vestibules. Look for freestanding or semi-freestanding for versatility. Big Agnes is my go-to for this style of tent, with some of the best space-to-weight ratios and designs on the market.
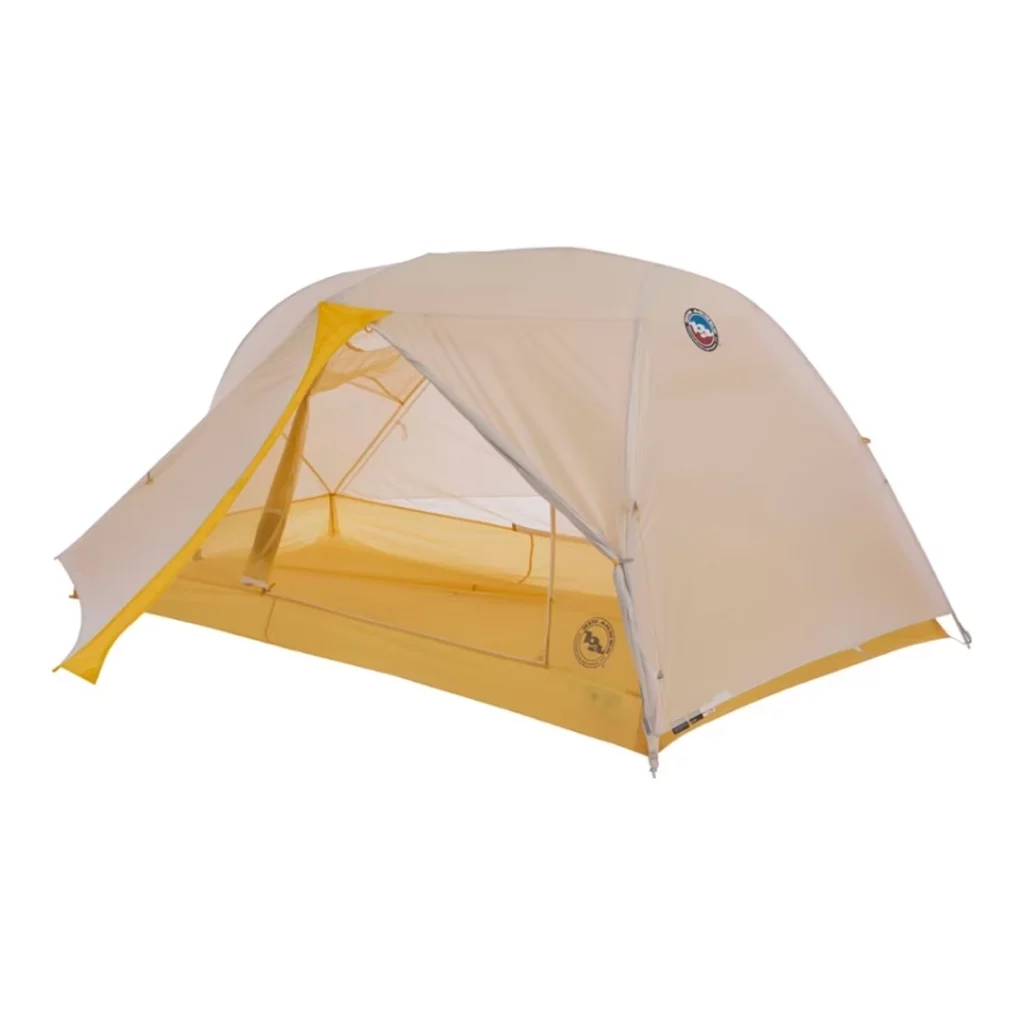
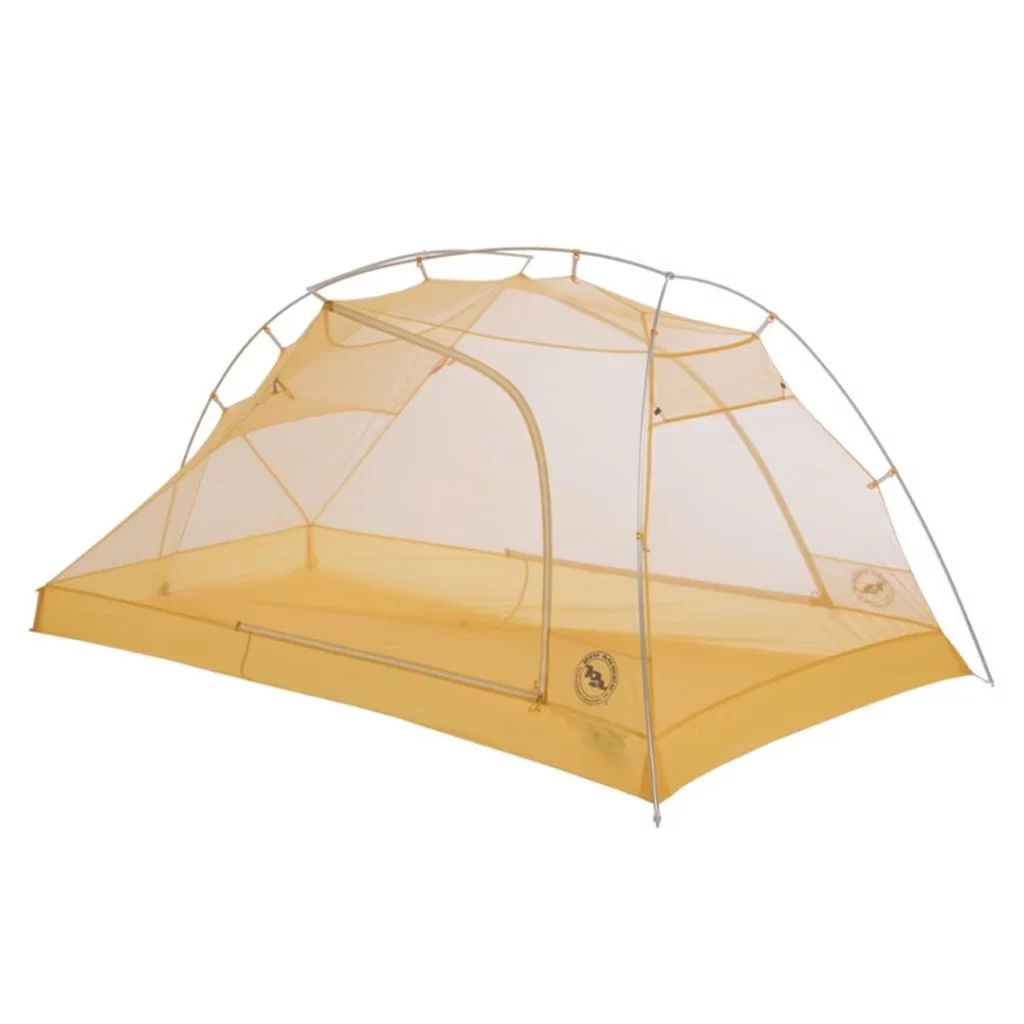
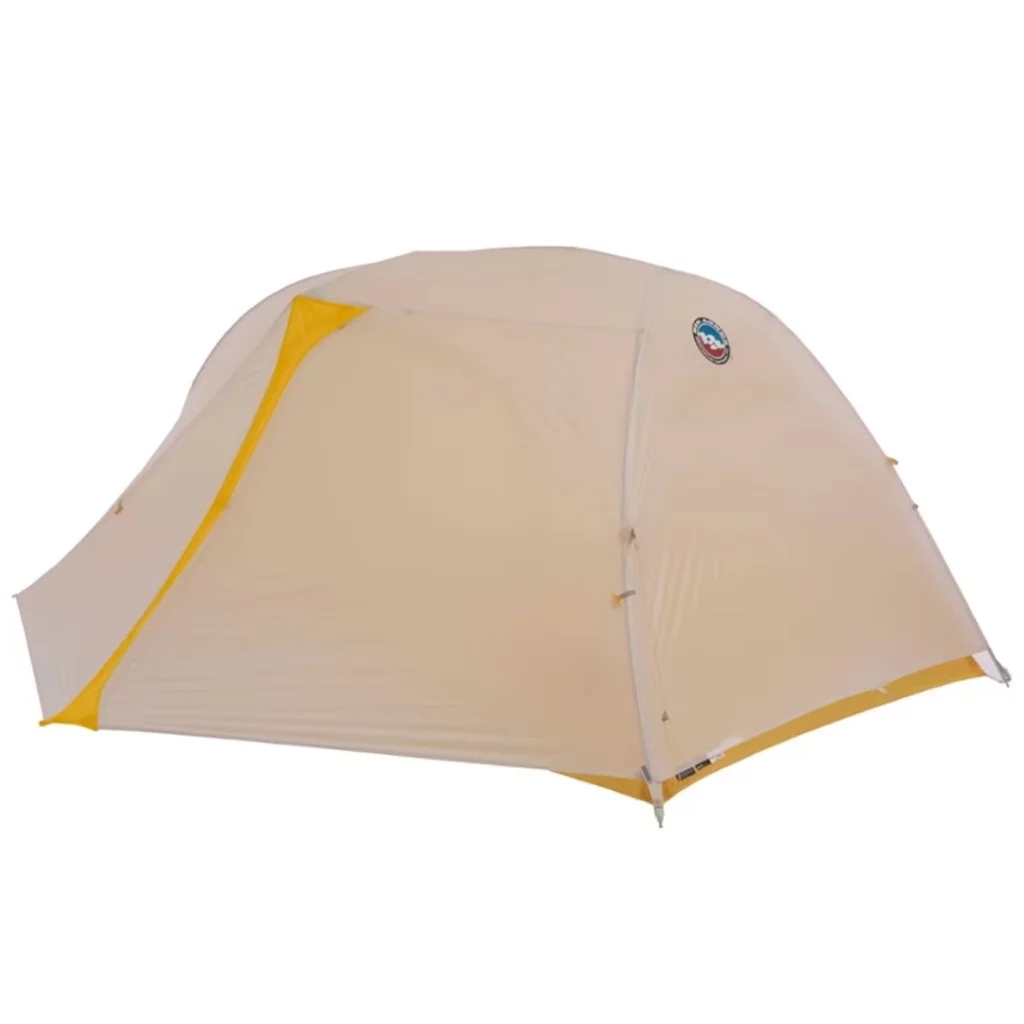
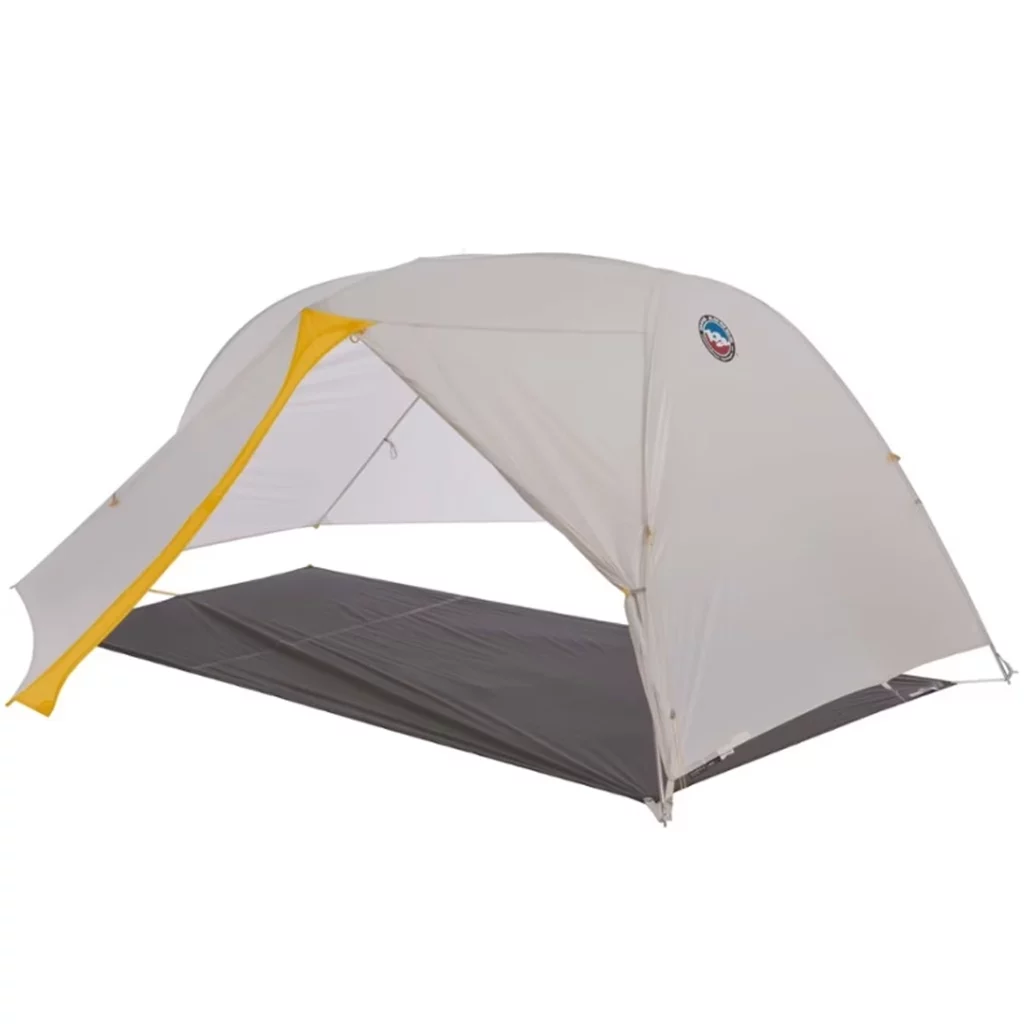
Why This Tent: This is my go-to tent for all but my lightest missions. Carrying a lightweight, spacious two-person tent leaves plenty of space for my gear inside the tent, and vestibule space for wet items and shoes. While the Tiger Wall is not entirely freestanding (you’ll need to stake the foot area for full structure) it’s more versatile than a trekking-pole shelter. It’s also plenty big for two people, but not too much for one person to carry. It has a single-hub pole design that deploys in minutes, and color-coded buckles for easy assembly. It has two doors and two vestibules for easy in-and-out with two people, and the latest model is solution-dyed, which is more fade-resistant and holds up better after seasons in the sun.
Sleeping Bag
NEMO Disco 15 Sleeping Bag
Women’s At-a-Glance: 17°F comfort | 5°F limit | 3 lbs | 650-fill down
Men’s At-a-Glance: 25°F comfort | 14°F limit | 2.75 lbs | 650-fill down
What to Look For: If you’re going to choose one sleeping bag, I suggest a mummy-bag style between 10-20 degrees. This might be overkill for warmer nights, but you can always unzip it for venting or leave it open like a quilt. On the coldest nights, throw a hat and jacket on and you’ll be set for all but the most extreme conditions. Men’s and women’s models are built with different amounts of fill based on where women and men lose more heat, so it can be beneficial to buy a gender-specific model. Plus, men’s bags are often longer, which means more space to heat up for smaller folks. Some people prefer quilts over fully enclosed sleeping bags, but if you’re going to have one model, I suggest getting a full-zip bag for colder nights.
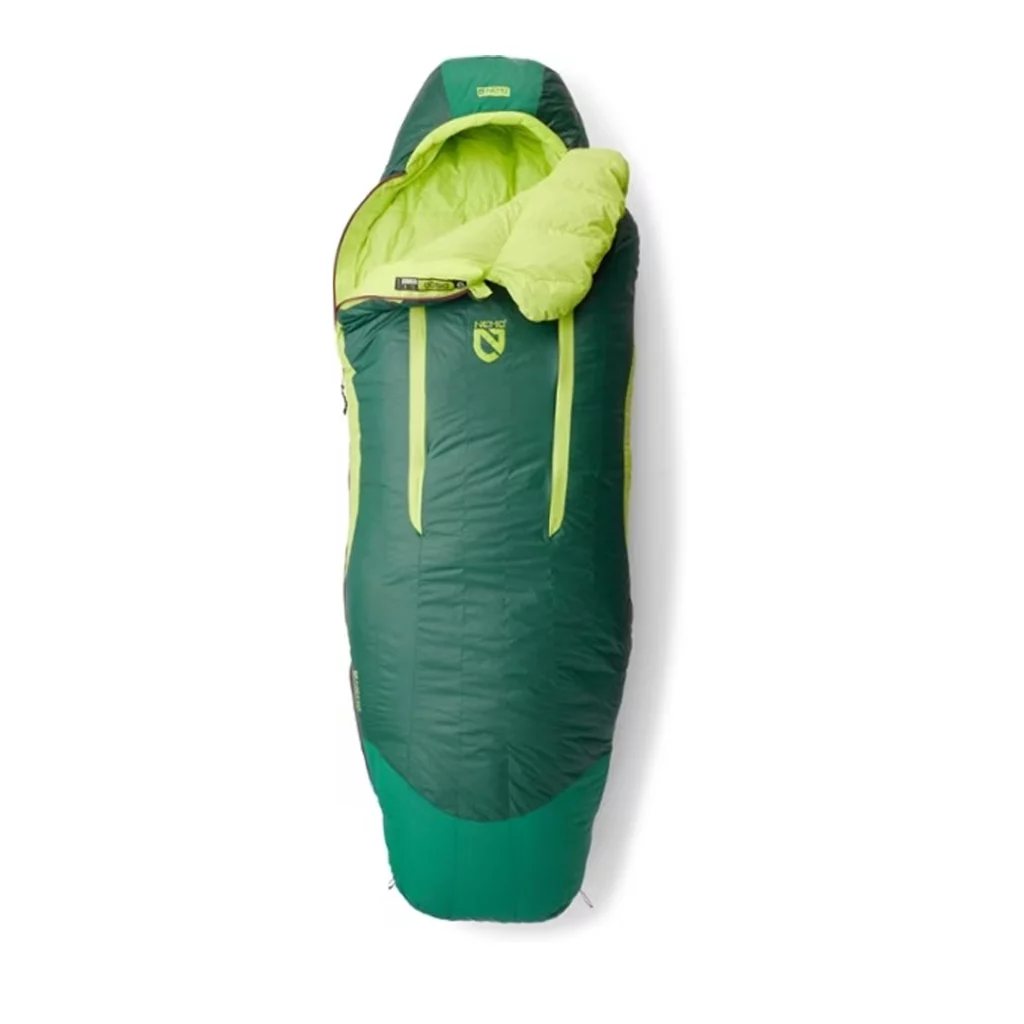
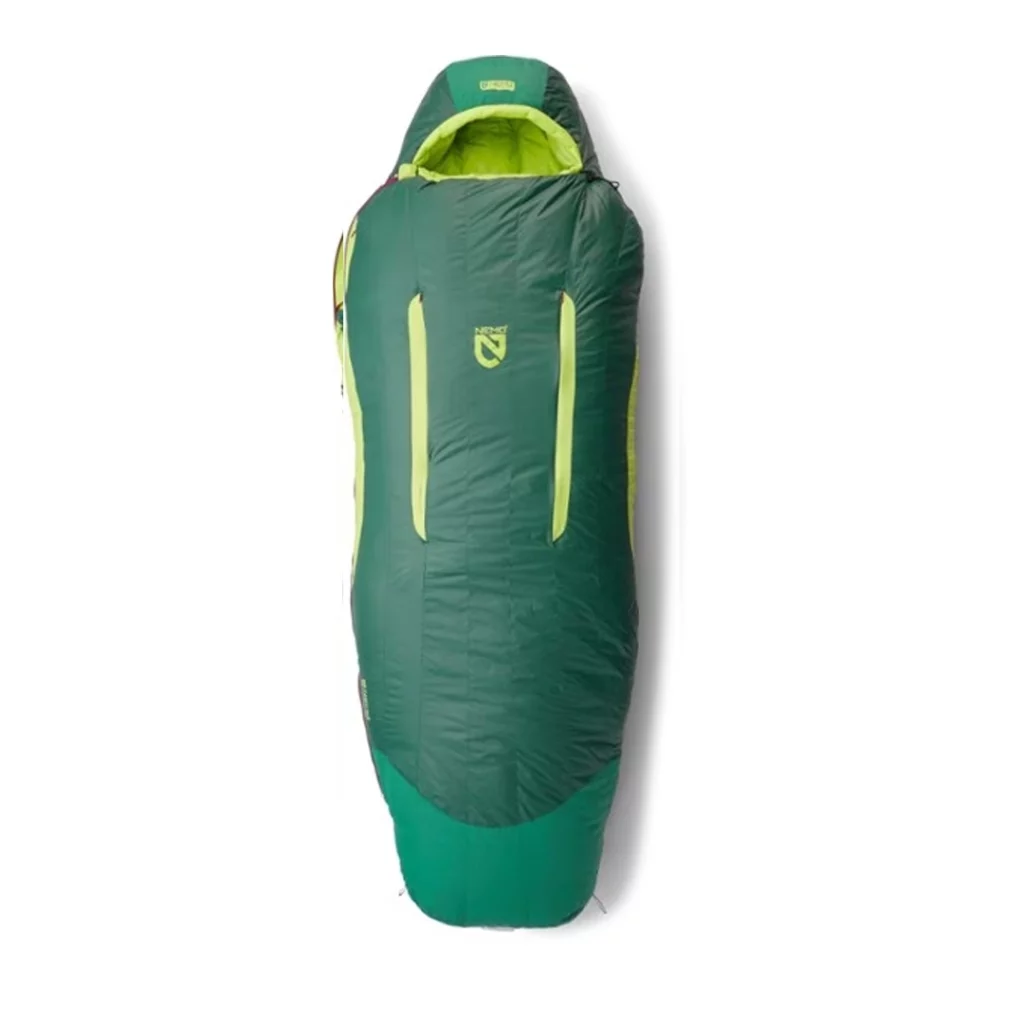
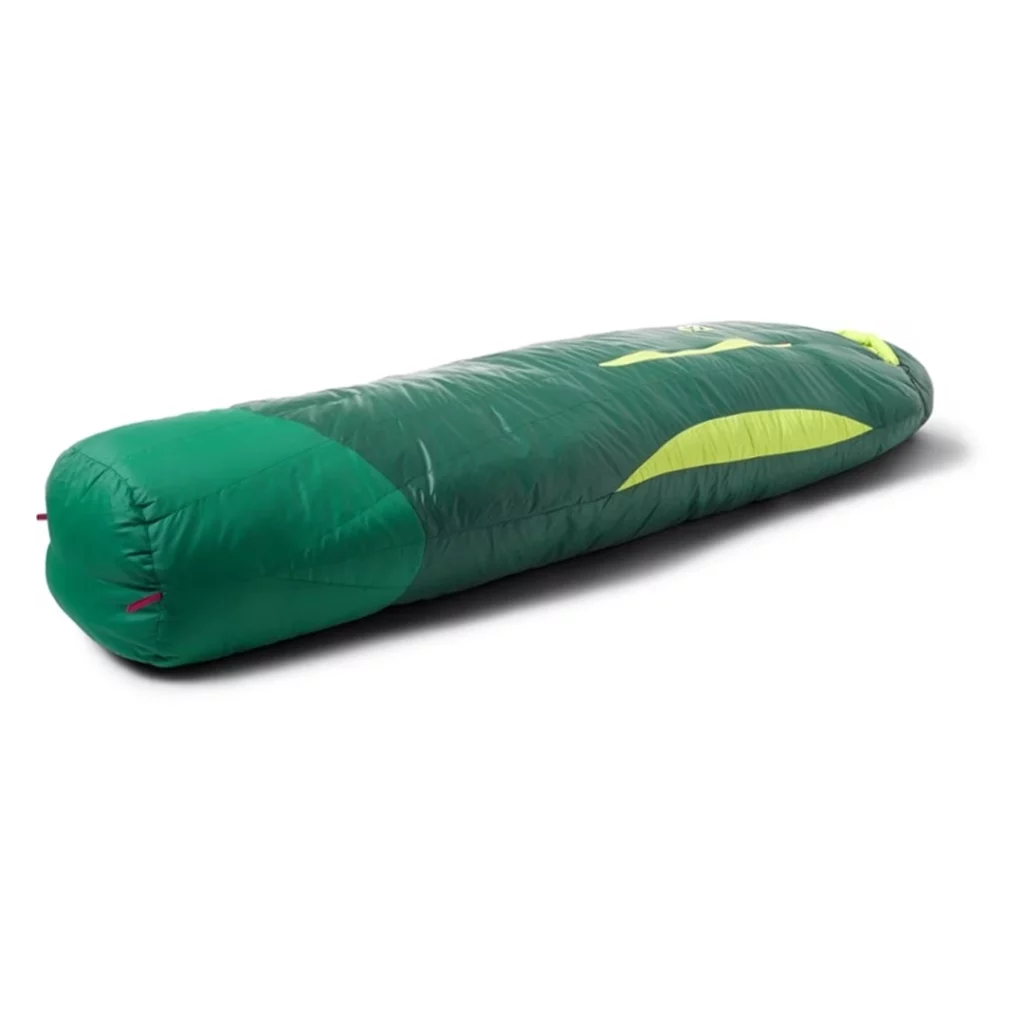
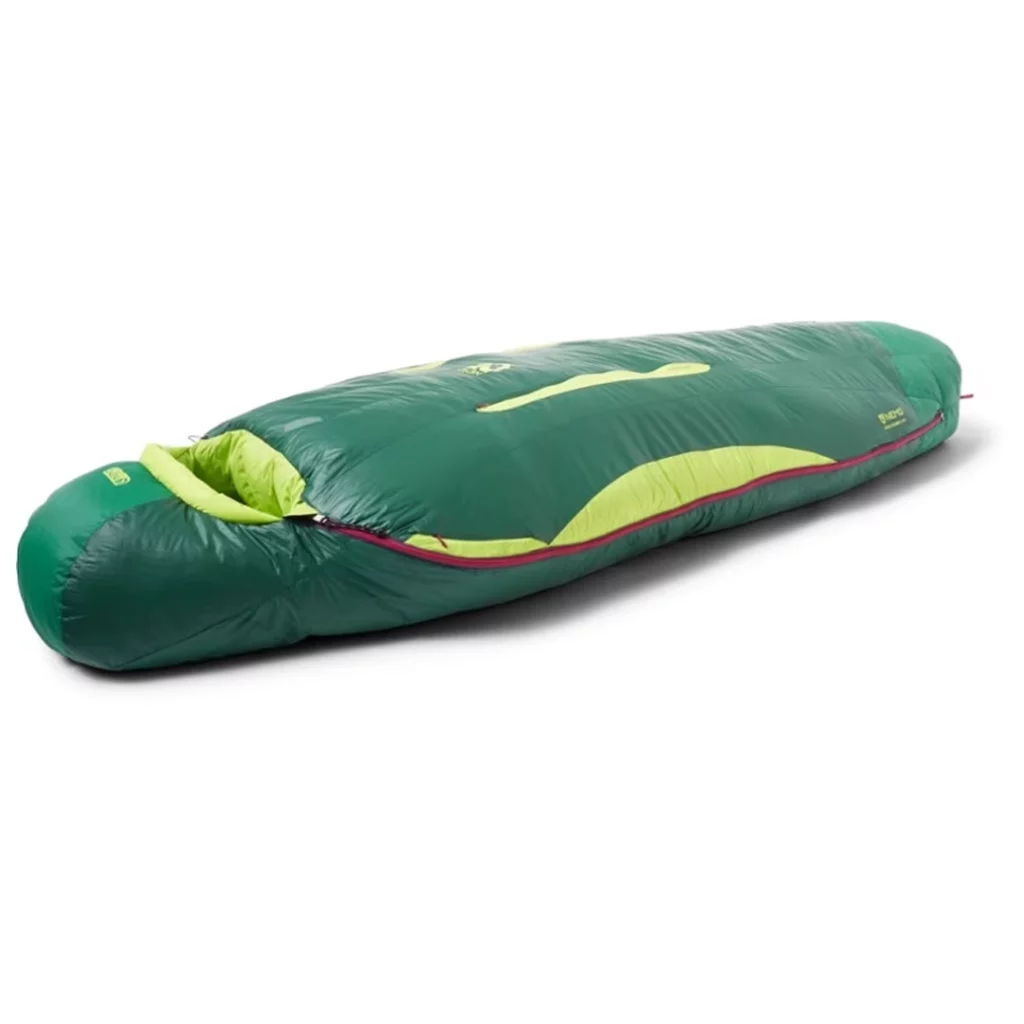
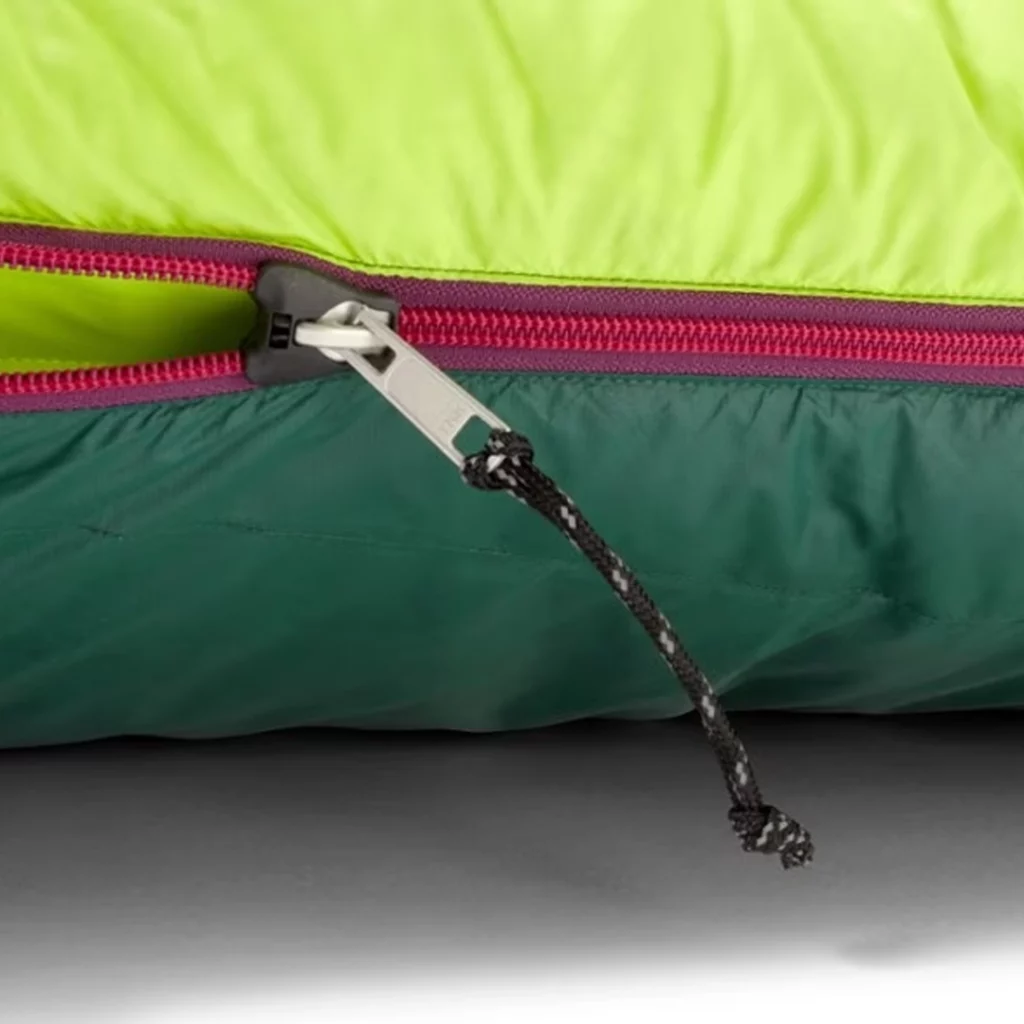
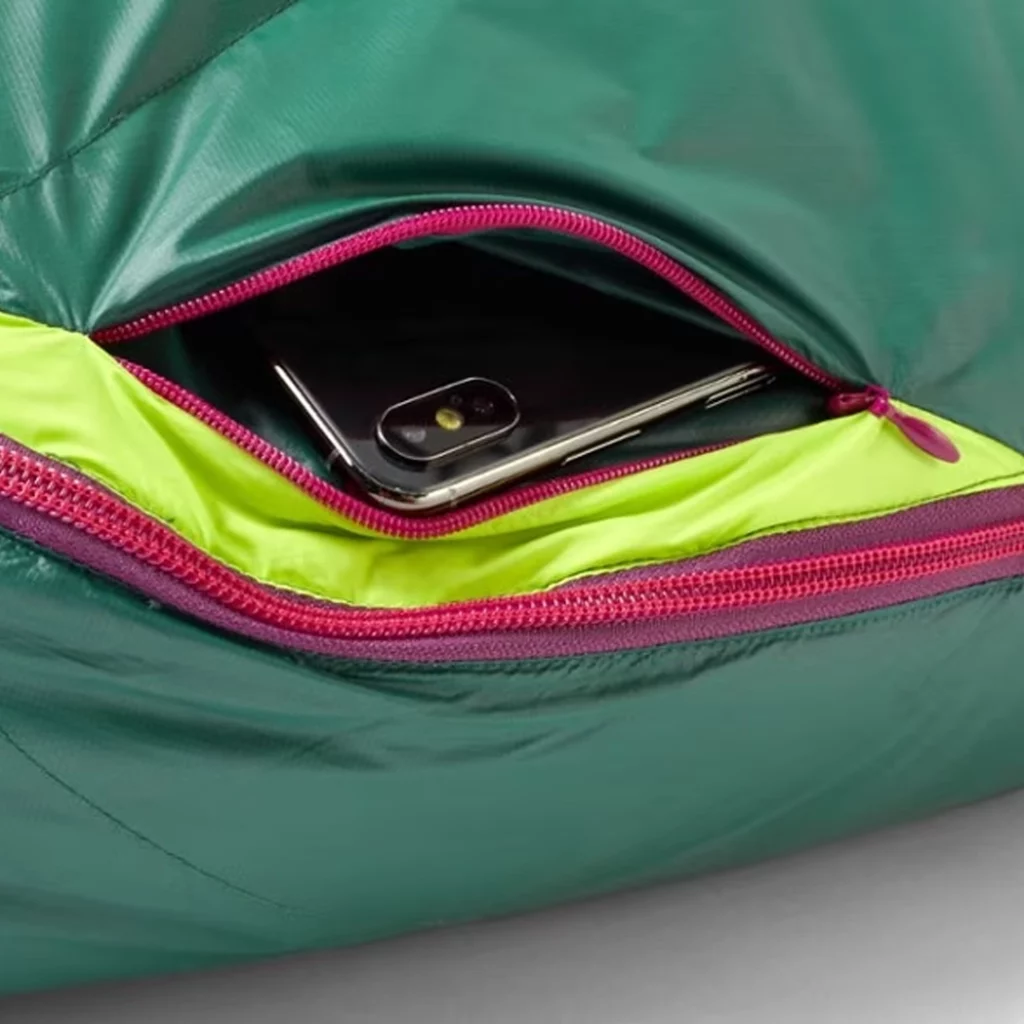
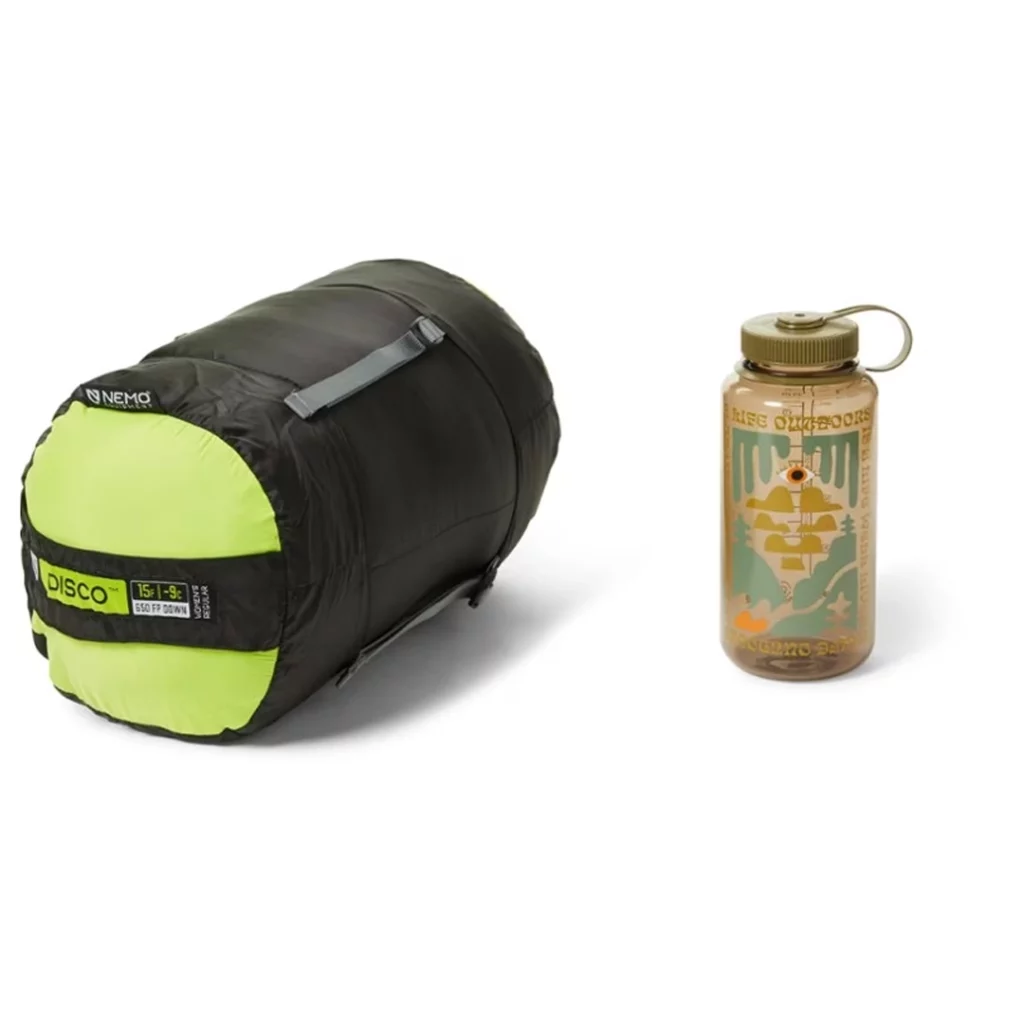
Why This Sleeping Bag: This isn’t the lightest bag on the market, but you’ll have a solid $100 over other options with only an 8-ounce penalty. This bag is a good middle-ground for active sleepers, with a shape made for people who tend to move around, and is great for side, back, and stomach sleepers. It has a deep hood that doesn’t slide off when you move around, DWR coating on the fabric to protect the down, and has NEMO’s Thermo Gills that vent heat, making this a versatile option for a range of temperatures.
Sleeping Pad
Sea to Summit Ultralight Insulated
At-a-Glance: 17 ounces | 3.1 R-value | 2-inch thickness | inflatable
What to Look For: Since we’re going with a one-pick option here, I’d opt for the comfort of an inflatable pad over the convenience of a z-fold. Inflatable pads come in a variety of R-values (warmth ratings), and each one varies in how many breaths it takes to inflate, as well as surface material durability. Look for a sleeping pad with an R-value of at least 2.7, and one that weighs no more than 1.5 pounds. Less is more, but also remember that the lower the weight, the less durable the face fabric, and you’ll have to be careful where you place it. Rocks, cactus spines, and sticks are prime for popping inflatable pads.
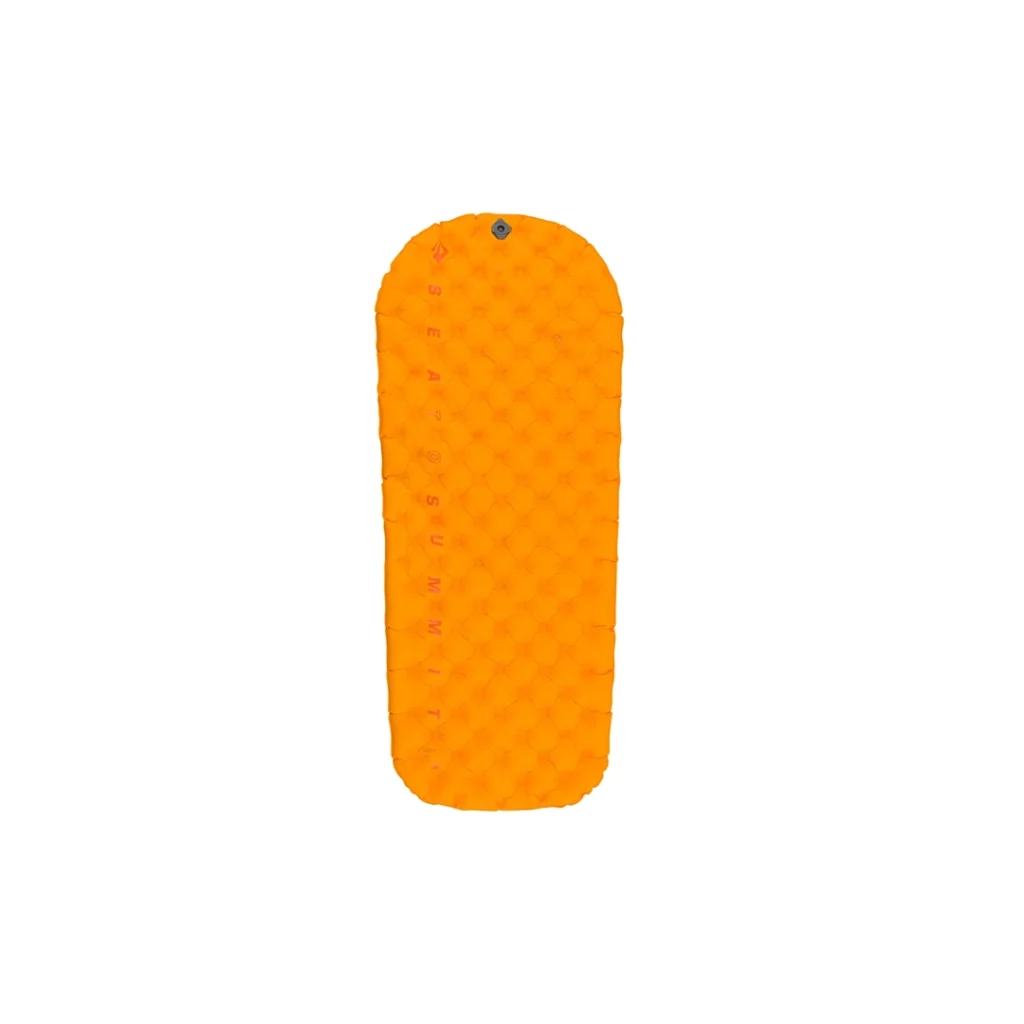
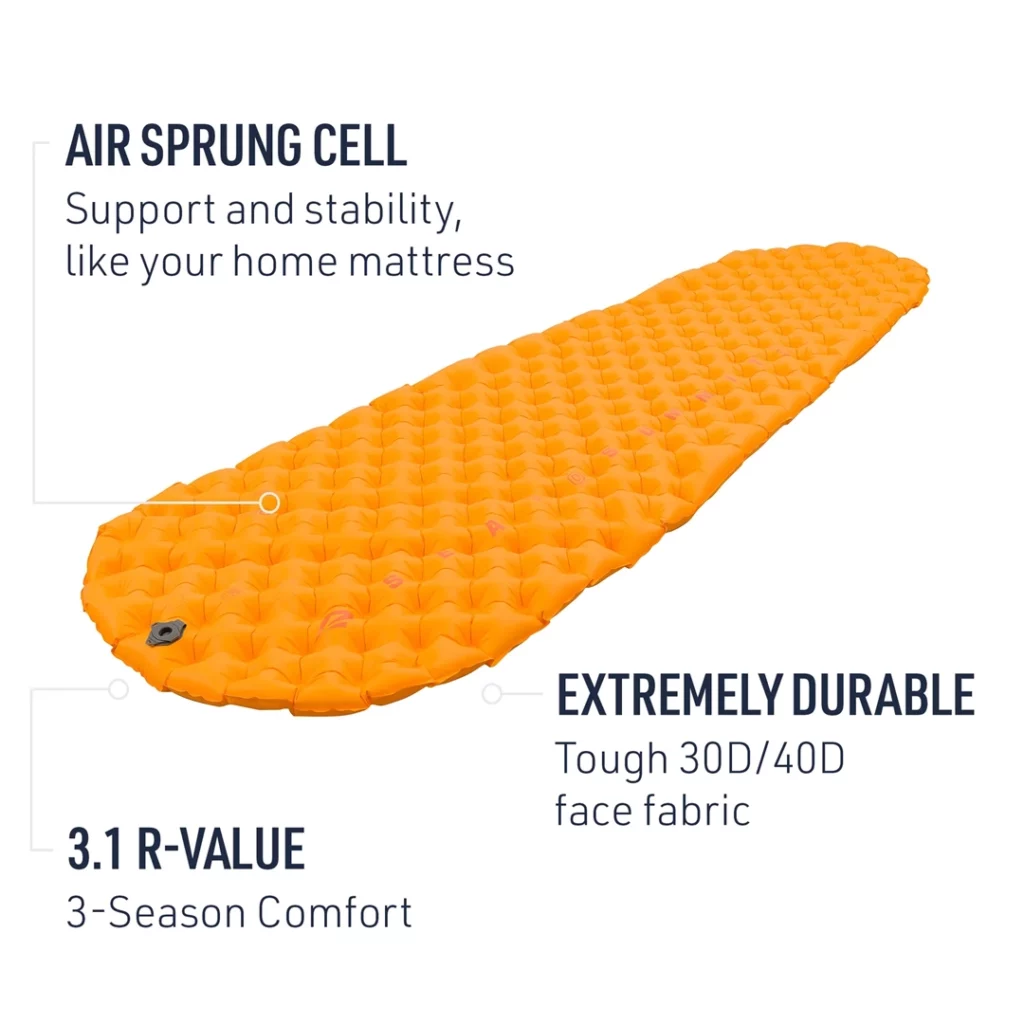
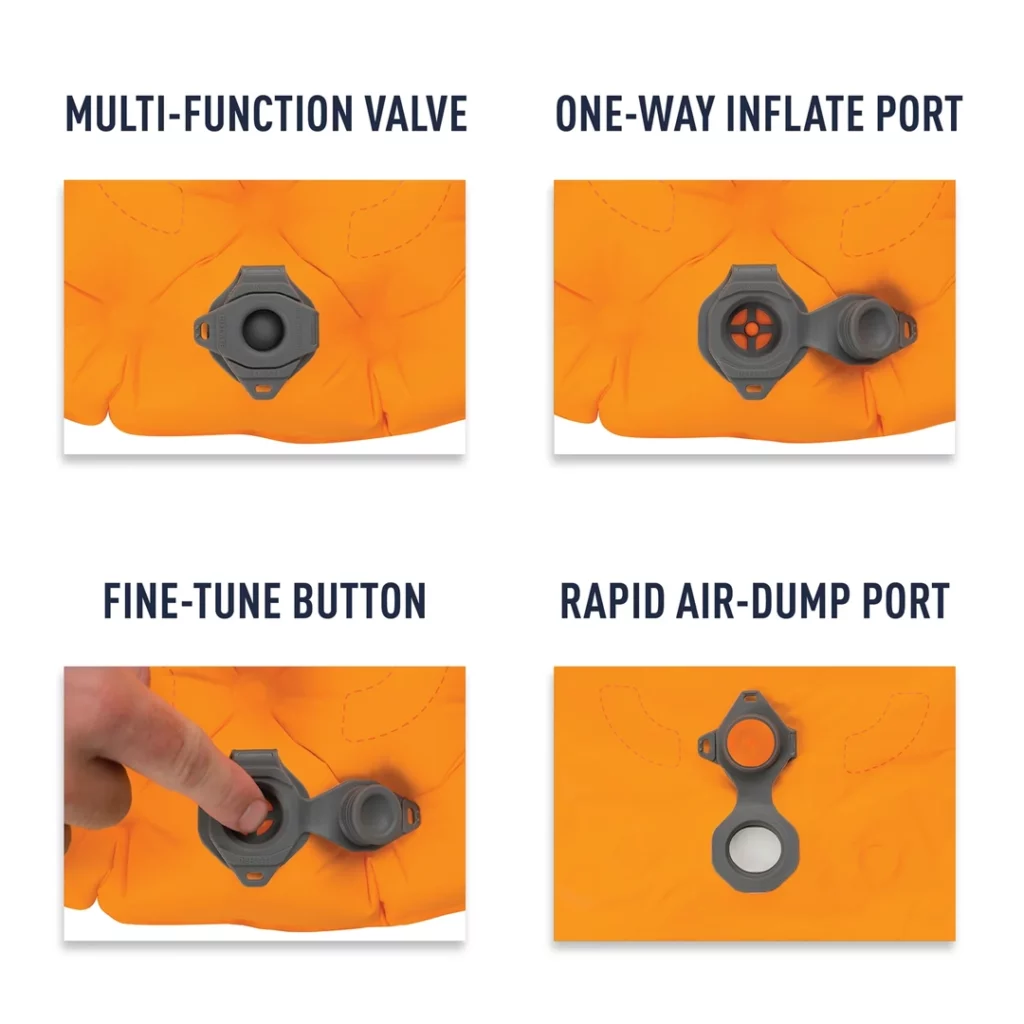
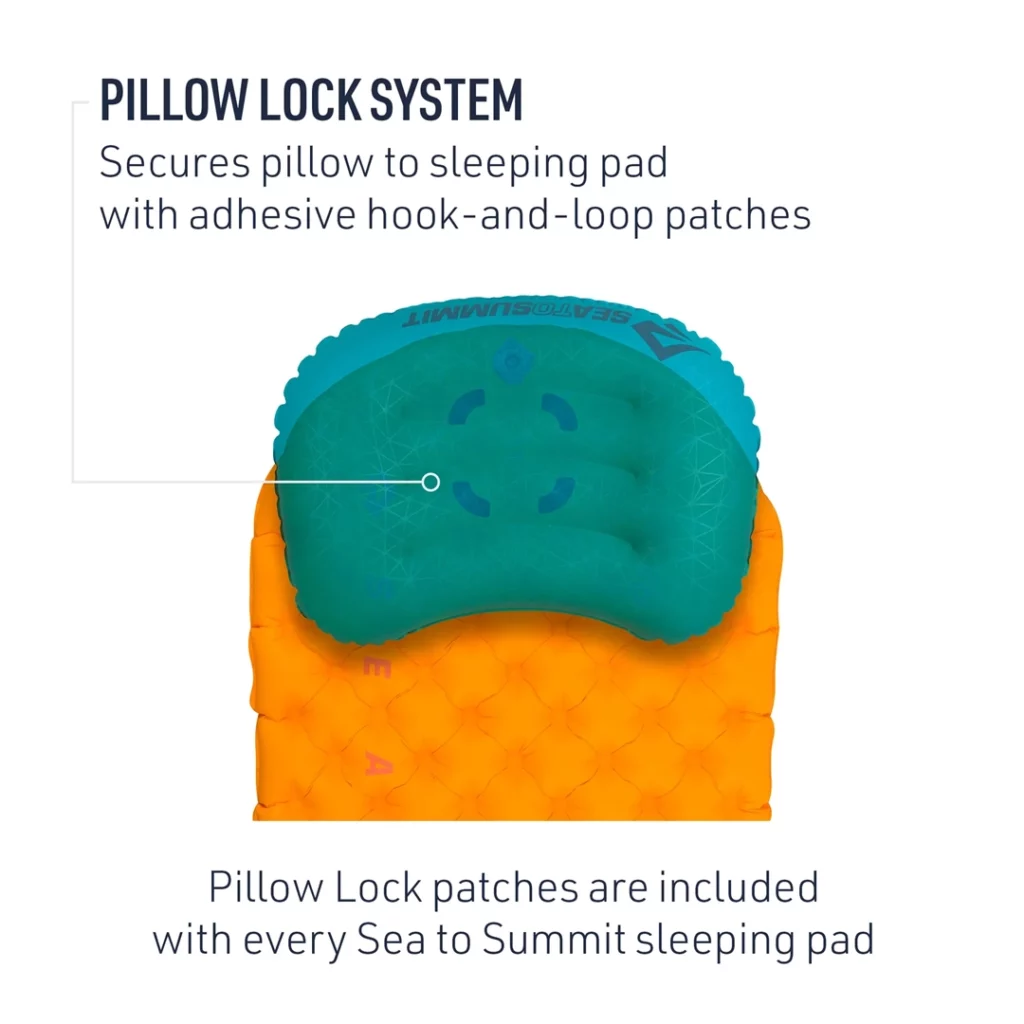
Why This Sleeping Pad: This sleeping pad converted me after five years of using a different brand. It takes just 10 breaths to inflate (compared to 30 breaths for other models), and I can’t feel the ground no matter how much I toss and turn. The outer material is a durable 30-denier ripstop nylon, which means it’s a few ounces heavier than other pads on the market, but I have yet to pop mine. The two-way valve makes it easy to inflate and deflate, and you can customize the amount of air in the pad. I’ve used this pad on trips down to 10°F and been perfectly protected from the ground. The only compromise is a bit of weight for the increased durability, but after popping other pads, I’ll take it. As an addition to your sleep system, I never go backpacking without my Sea to Summit Pillow. It weighs just a few ounces, inflates in four breaths, and is way more comfortable than folding a jacket under my head.
Water Treatment
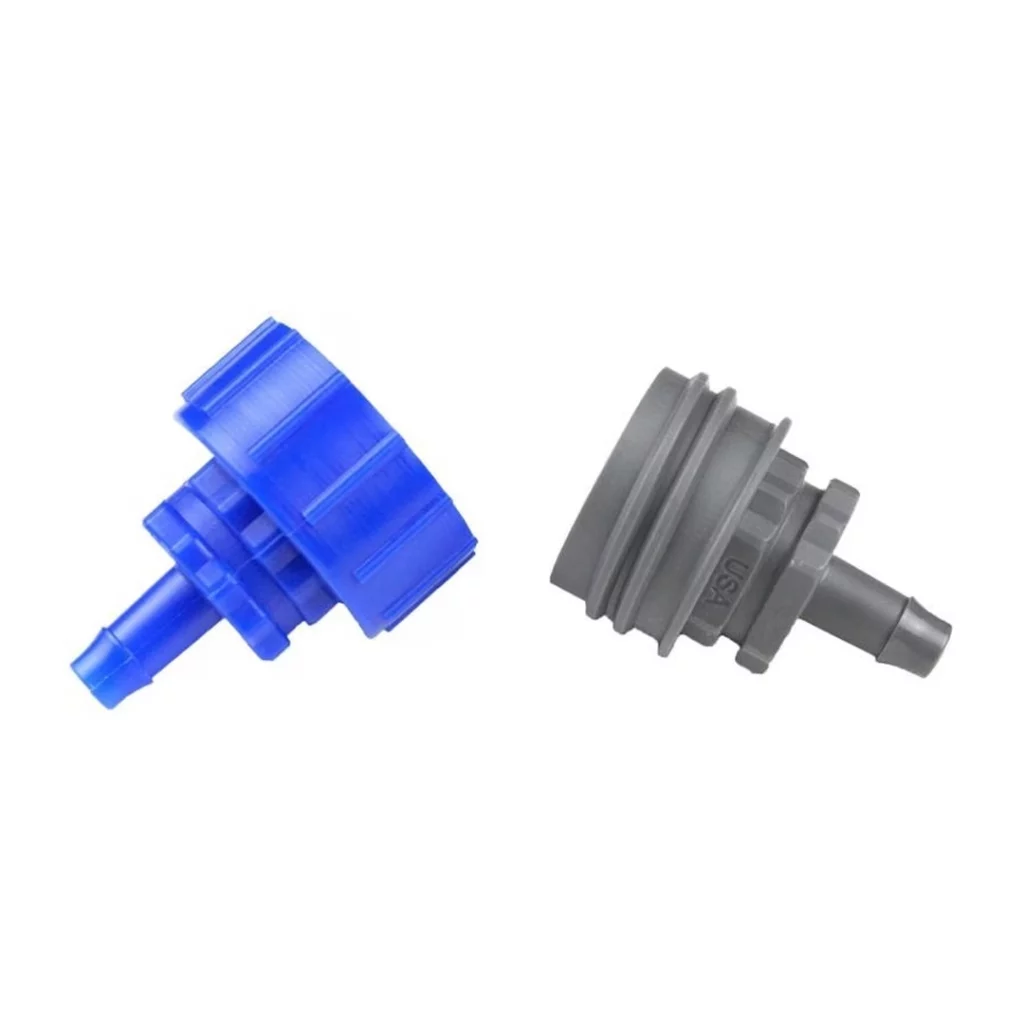
Sawyer Squeeze
At-a-Glance: 3 ounces | 2” x 5” | Hollow-fiber membrane | 1.7 liters / minute
What to Look For: Filtering water is more labor intensive than using treatment drops, but it does double duty filtering out bacteria and silt. It’s also faster—a clean filter can treat more than one liter per minute, whereas you’ll have to wait at least 20 minutes for treatment drops to become effective. Look for a filter that can screw onto a water bottle cap or reservoir bag for easier drinking and squeezing, and your model shouldn’t weigh more than a few ounces. Clean or backflush the filter after every few days of use and it’ll last you season after season without slowing down too much.
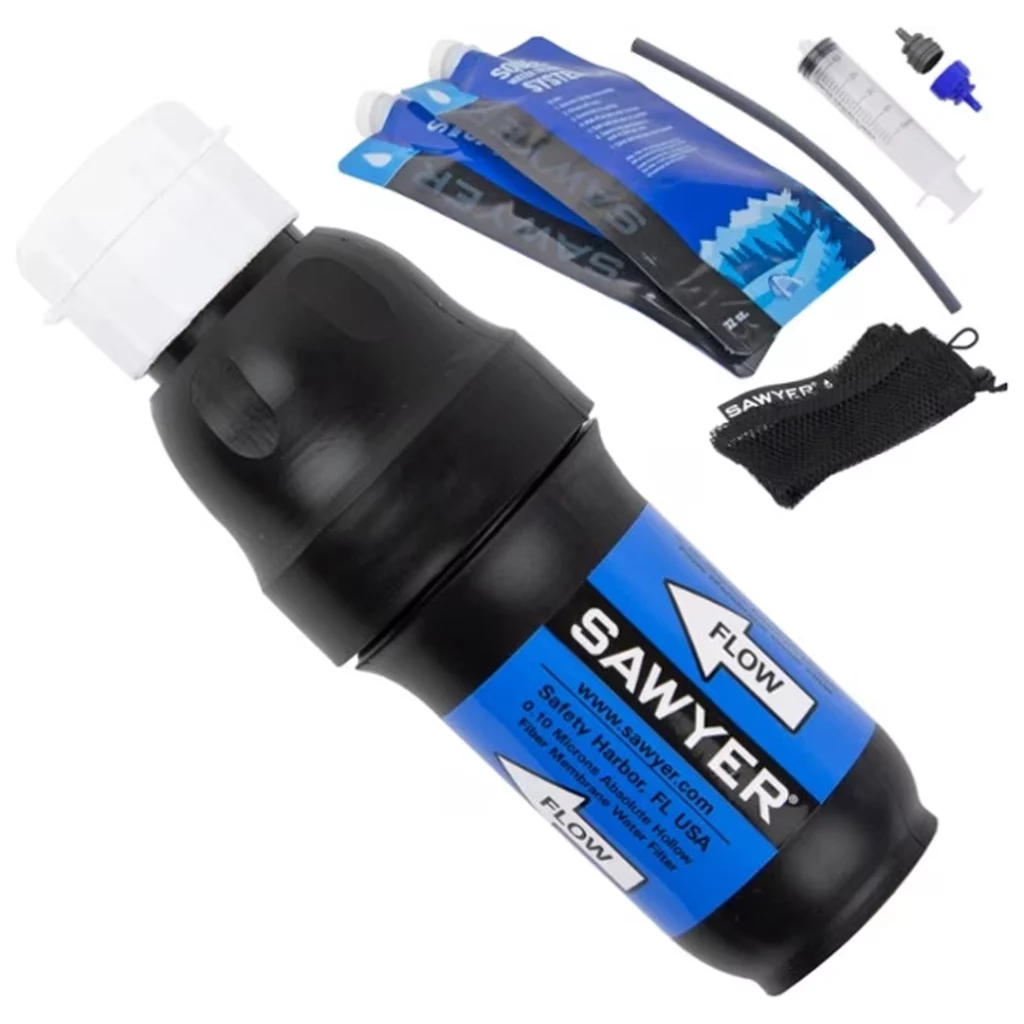
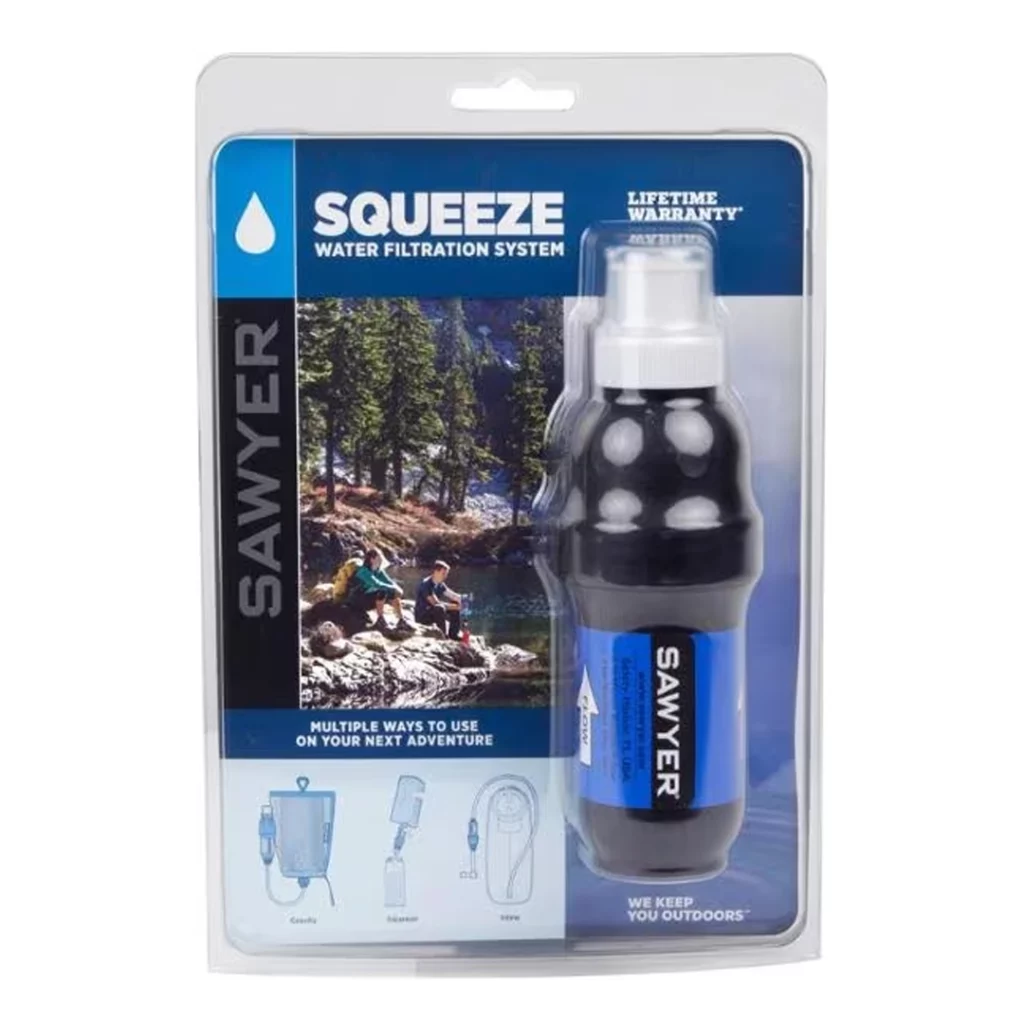
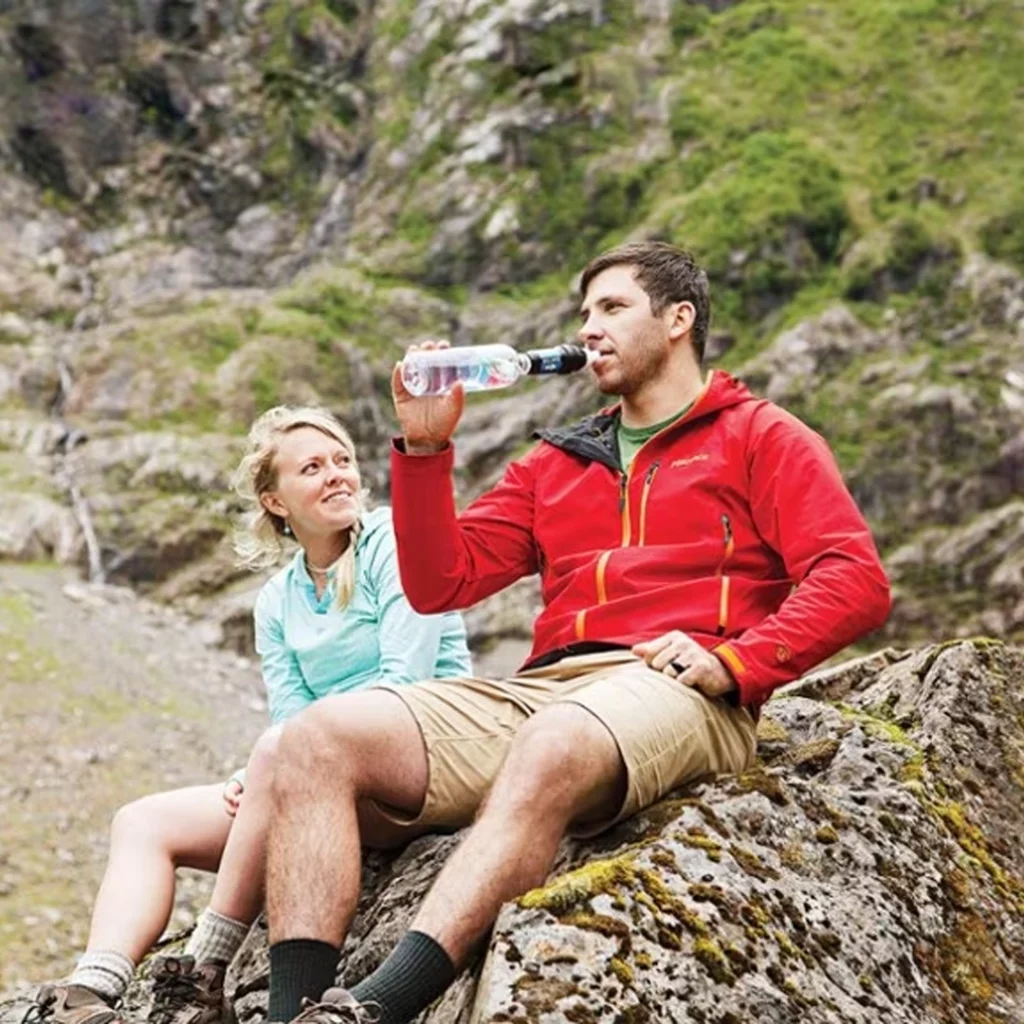
Why This Filter: I’ve tested plenty of filters in my day, and the original Sawyer Squeeze holds true with the fastest filter rate, most convenient for use with other bottles, and most reliable. As long as you don’t tighten it too hard, the gasket will seal perfectly each time, and if you backflush it after each trip, it keeps a great flow rate. These filters come with easy-to-drink from tops, and I usually end up screwing mine onto a standard Smartwater bottle and drinking from that on my trips, filtering right into my cookpot from the bottle. Plus, Sawyer does amazing work with their global initiatives to provide clean water to developing communities.
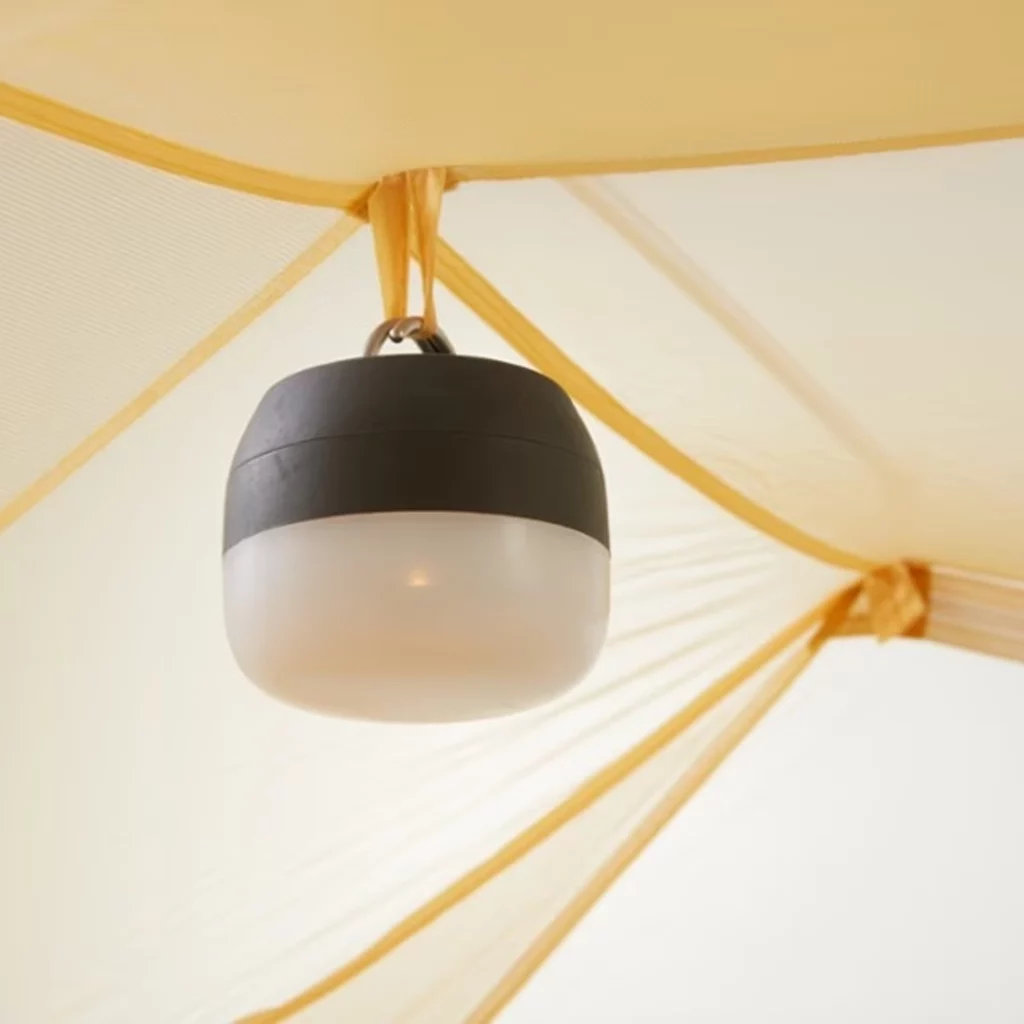
Headlamp
Black Diamond Cosmo 350-R Headlamp
At-a-Glance: 2.65 ounces | 350 lumens | 5 hours battery on high | rechargeable
What to Look For: For a backpacking headlamp, I recommend a maximum lumen (brightness) output of around 300. This is more than enough to hike on a dark trail or find your way around camp at night, and it’s not so bright to blind other hikers or burn through battery too quickly. When shopping for a backpacking headlamp, look at lumen options and battery life. You want a few different brightness options, and at least a few hours of battery life on the highest setting. I recommend a rechargeable model, as you can always charge it with a battery pack and not worry about carrying extra batteries. Lastly, I like a model with a red-light option so you don’t disturb your tentmate or other people at the campsite at night.
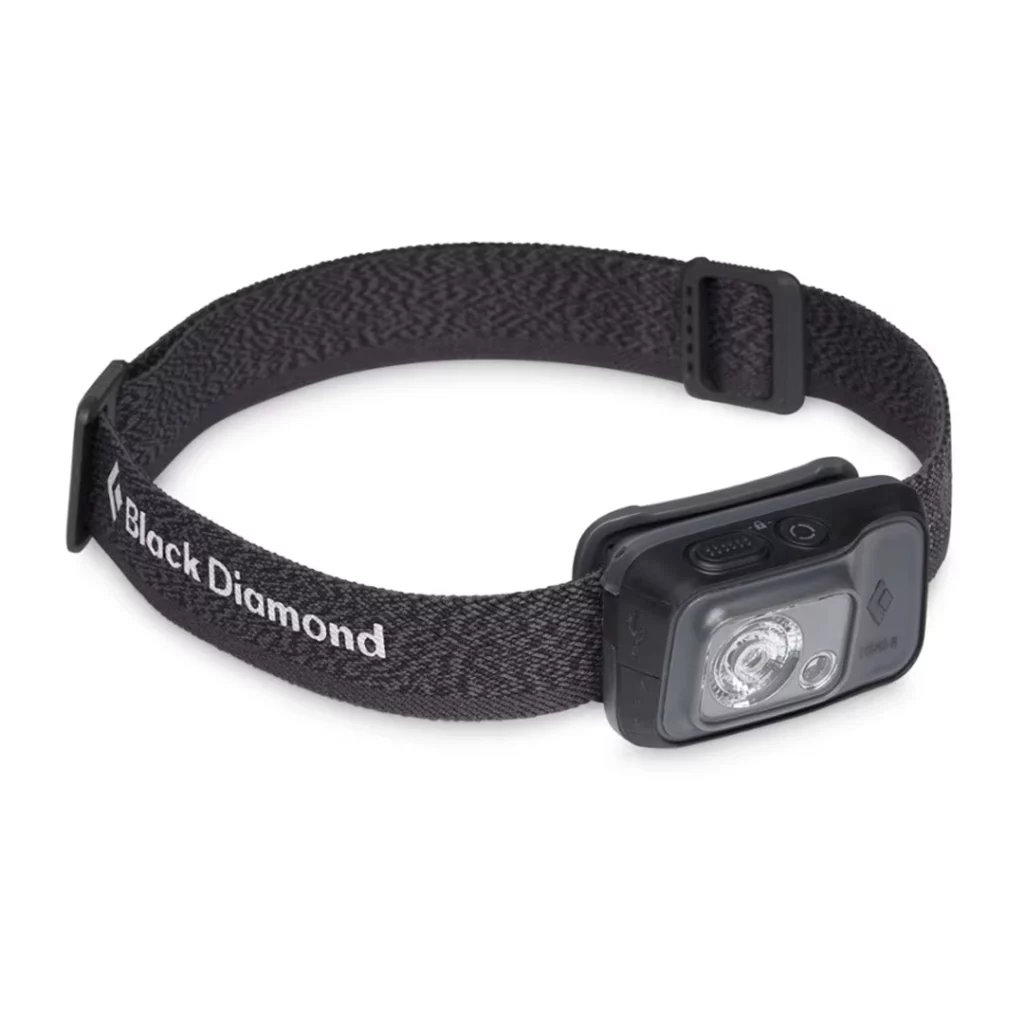
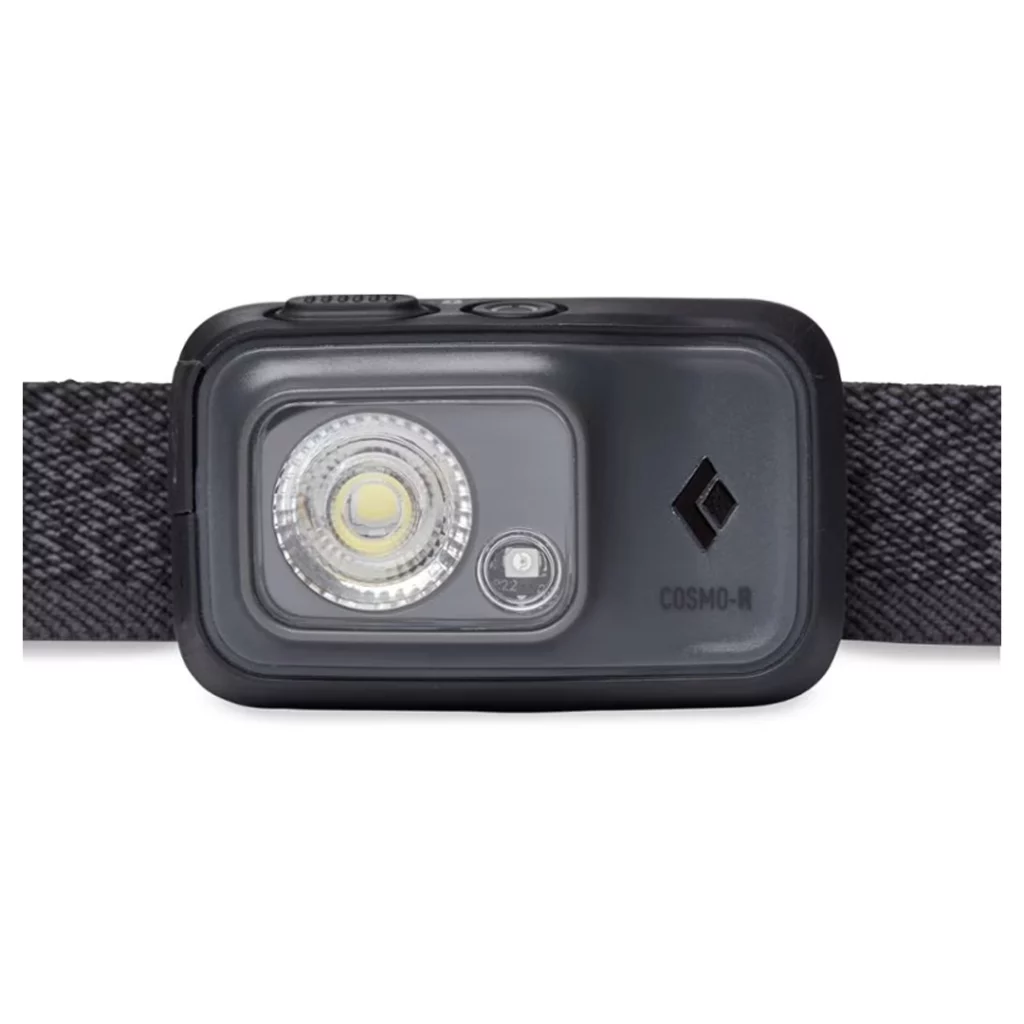
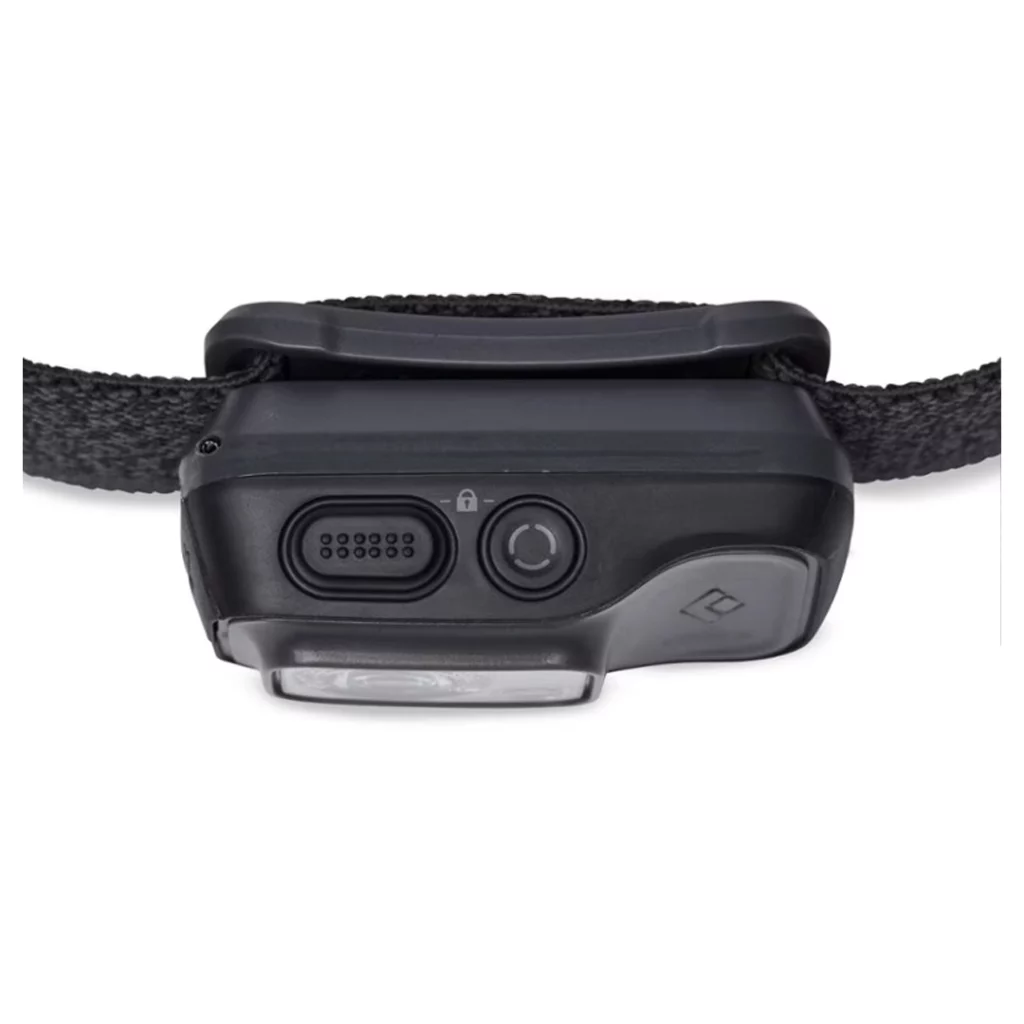
Why This Headlamp: The rechargeable Cosmo 350 is a great combination of low weight, high lumen output, good battery life. Ideally you wouldn’t be using your headlamp on maximum output for an entire night, but five hours on 350 lumens is pretty darn good. At 175 lumens, this headlamp will last 10 hours. It’s easy to recharge, and has a wide, comfortable band that doesn’t bounce or slide down. There aren’t too many options or confusing button features, and it’s easy to use with gloves on and weighs under three ounces.
Trekking Poles
Leki Khumbu Lite Trekking Poles
At-a-Glance: 17.5 ounces | aluminum | 26” collapsed | 53” extended
What to Look For: Trekking poles are fairly straightforward, but look for a set that weighs under two pounds for the pair, and collapses down to no more than 28” in length. This could be a telescoping set or a z-fold set, but it’s nice to be able to stash them in the side pocket of your pack. Look for a reliable brand (less likely to collapse on you) and I like the stability of flick-locks. Twist-locks are fine too, but I’ve had some get jammed with dirt and not secure all the way when I think they’re locked. Carbon poles are lighter but pricier, and aluminum poles can be more durable, plus you’ll save a lot of money.
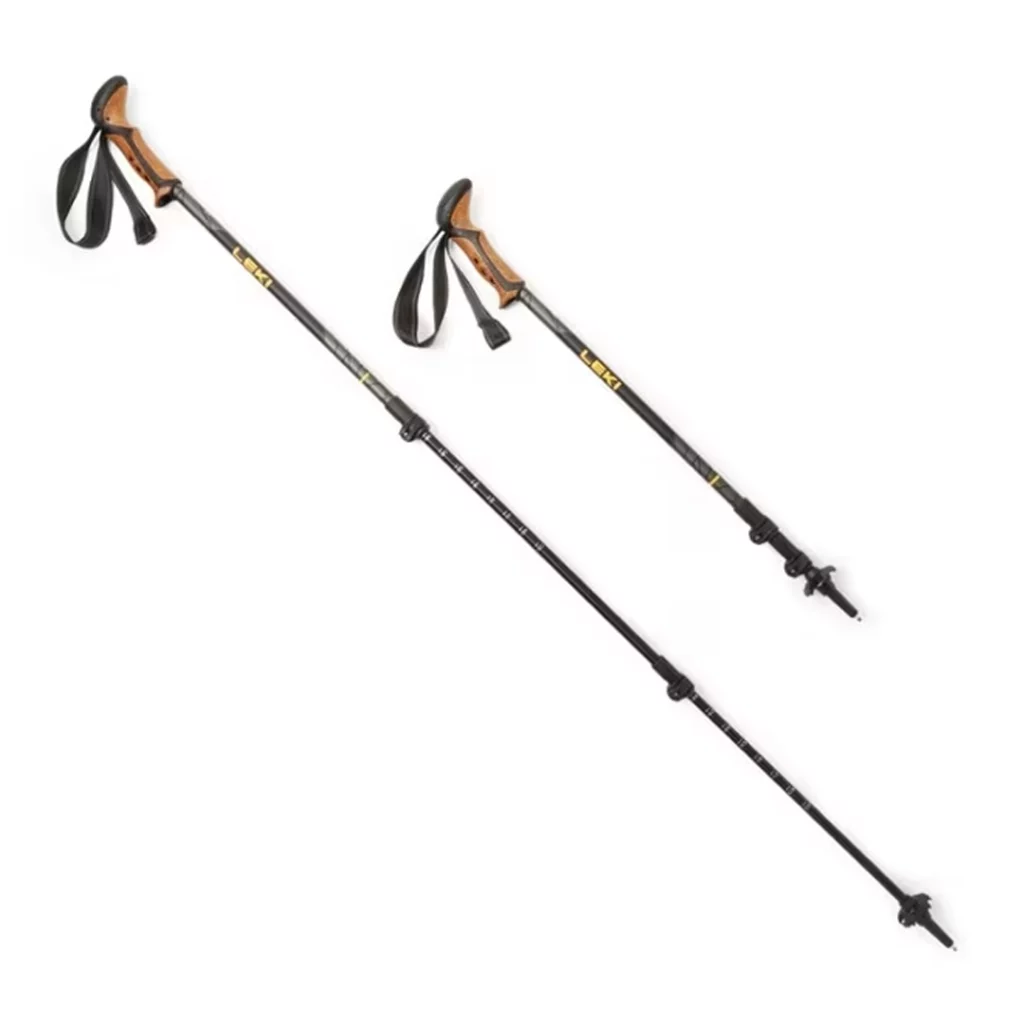
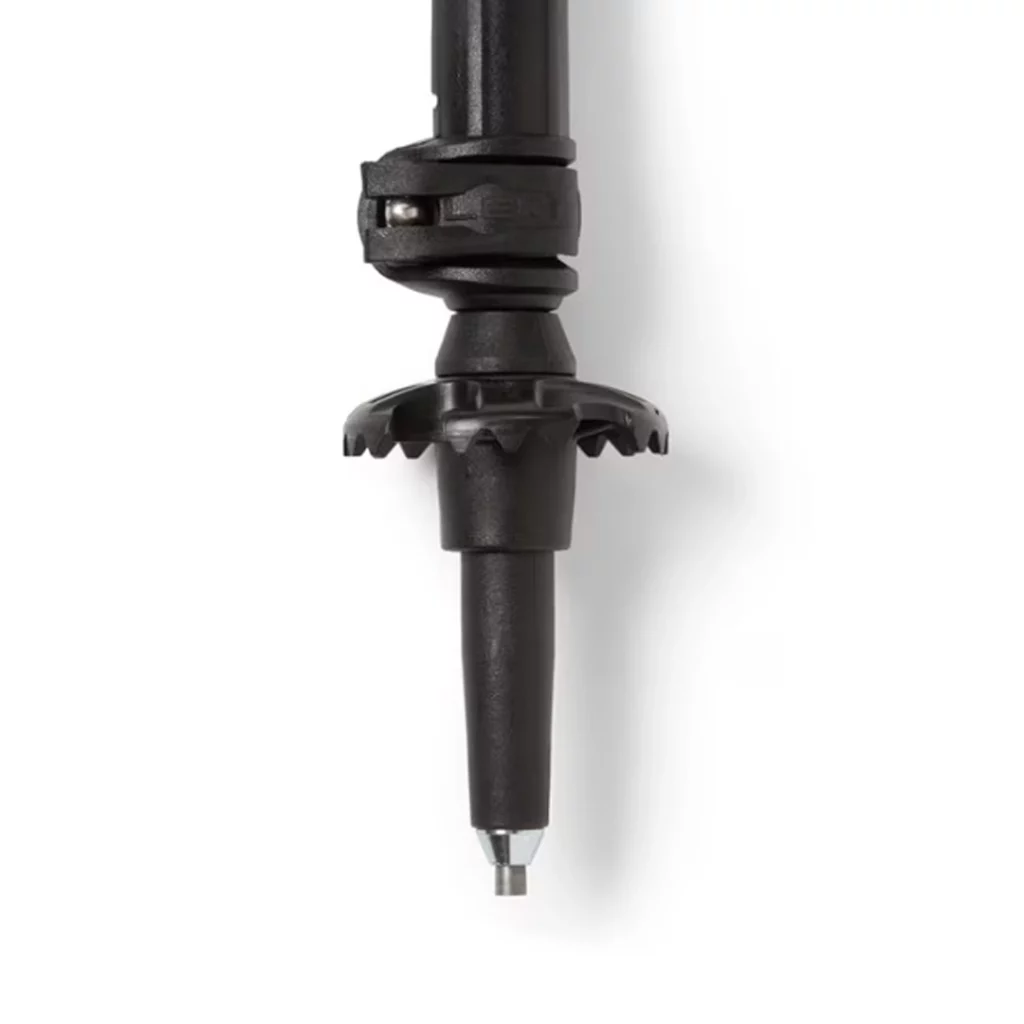
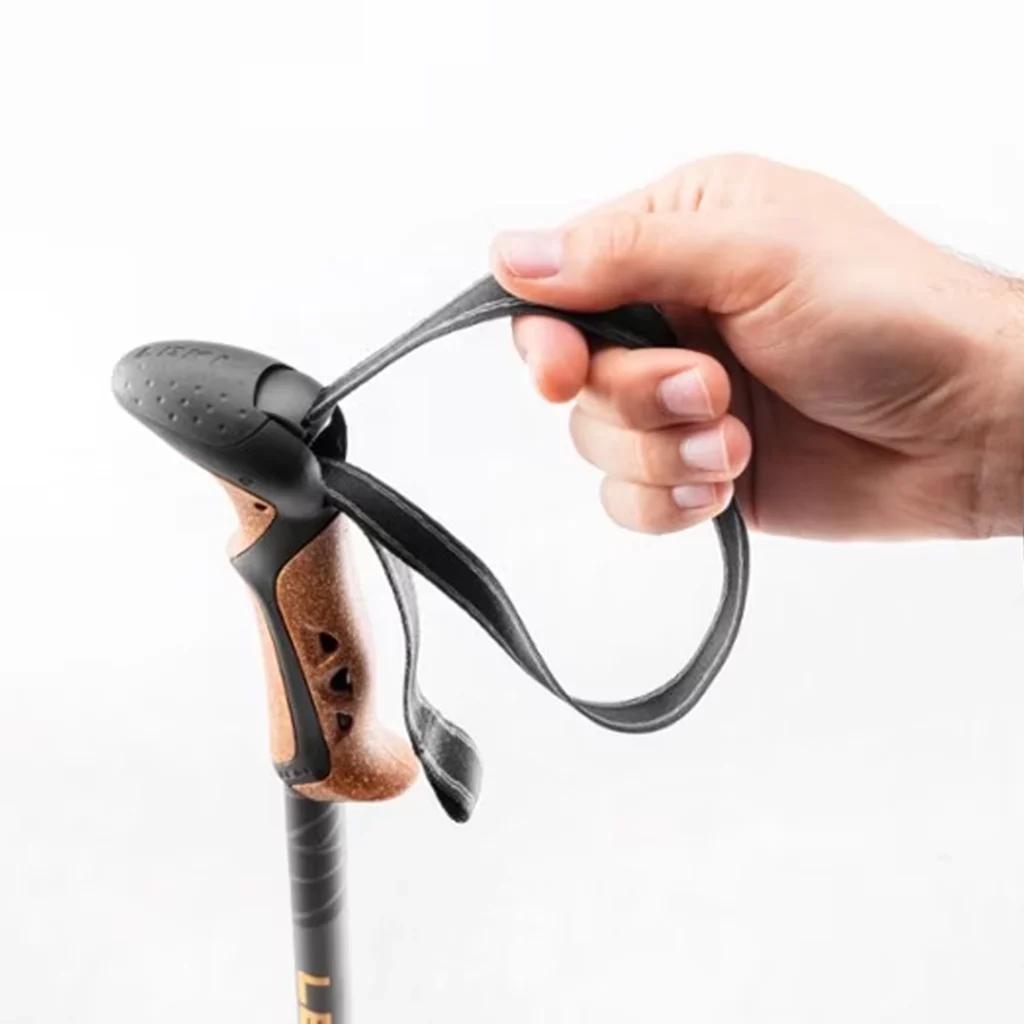
Why These Poles: Leki is a super reliable brand—I’ve used their poles since 2015 with barely any instances of locking failures or collapsing. This aluminum set is quite lightweight (and affordable) for how durable they are, and they have a sweat-absorbing cork handle and soft straps that slip over your hands. These are a telescoping model, collapsing down to 26 inches and extending for use between 39 and 53 inches—more than enough range for most hikers. The flick-locks are sturdy and secure, and make for easy adjustments on steep ascents or descents.
Stove/Cookset
Jetboil Flash
At-a-Glance: 13 ounces | 1 liter capacity | isobutane fuel | 3.5 minutes to boil
What to Look For: Trekking poles are fairly straightforward, but look for a set that weighs under two pounds for the pair, and collapses down to no more than 28” in length. This could be a telescoping set or a z-fold set, but it’s nice to be able to stash them in the side pocket of your pack. Look for a reliable brand (less likely to collapse on you) and I like the stability of flick-locks. Twist-locks are fine too, but I’ve had some get jammed with dirt and not secure all the way when I think they’re locked. Carbon poles are lighter but pricier, and aluminum poles can be more durable, plus you’ll save a lot of money.
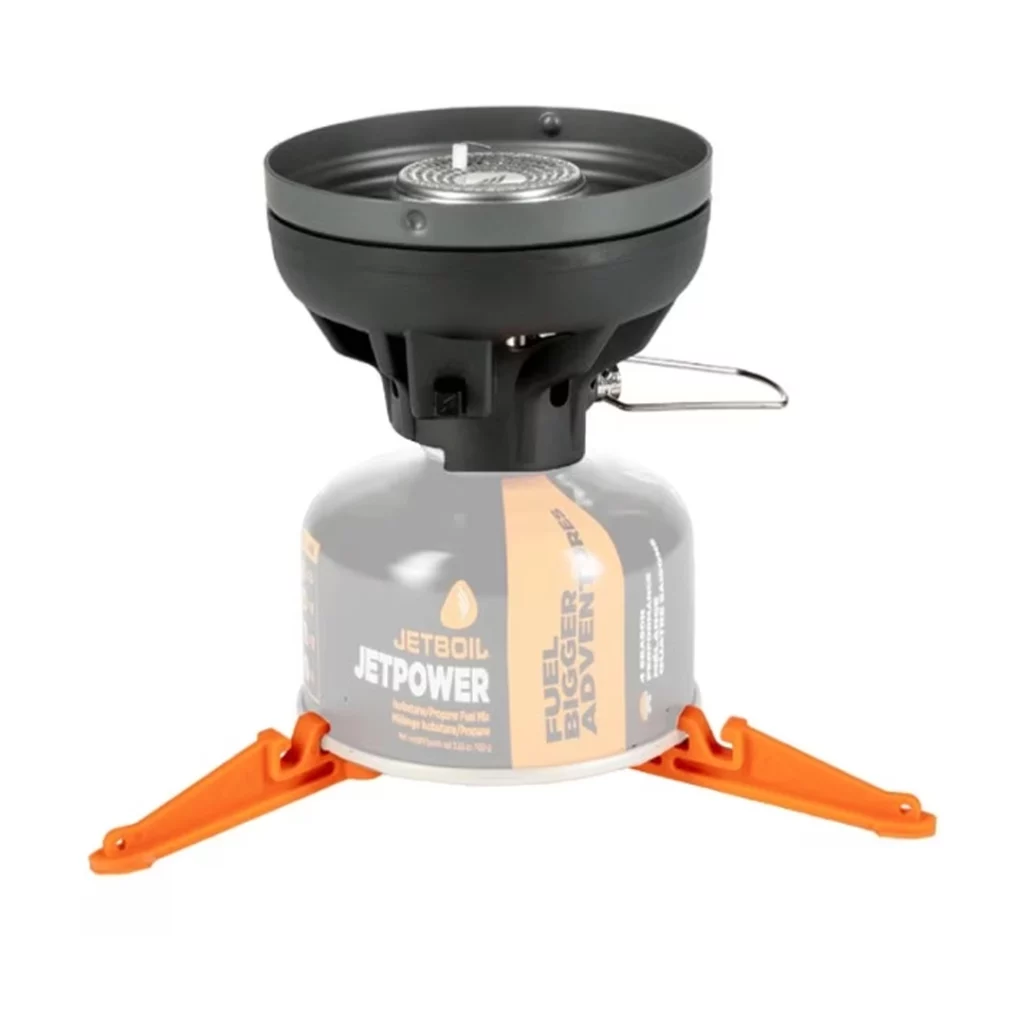
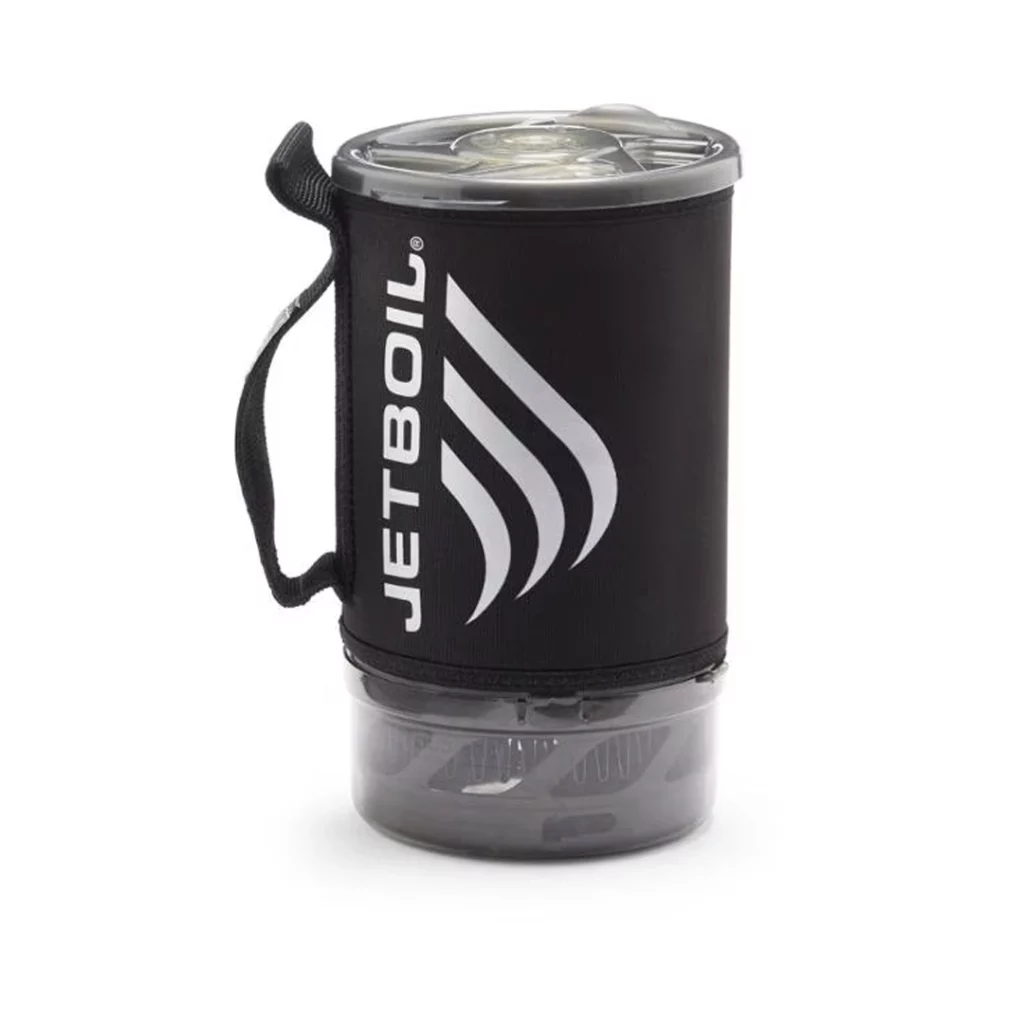
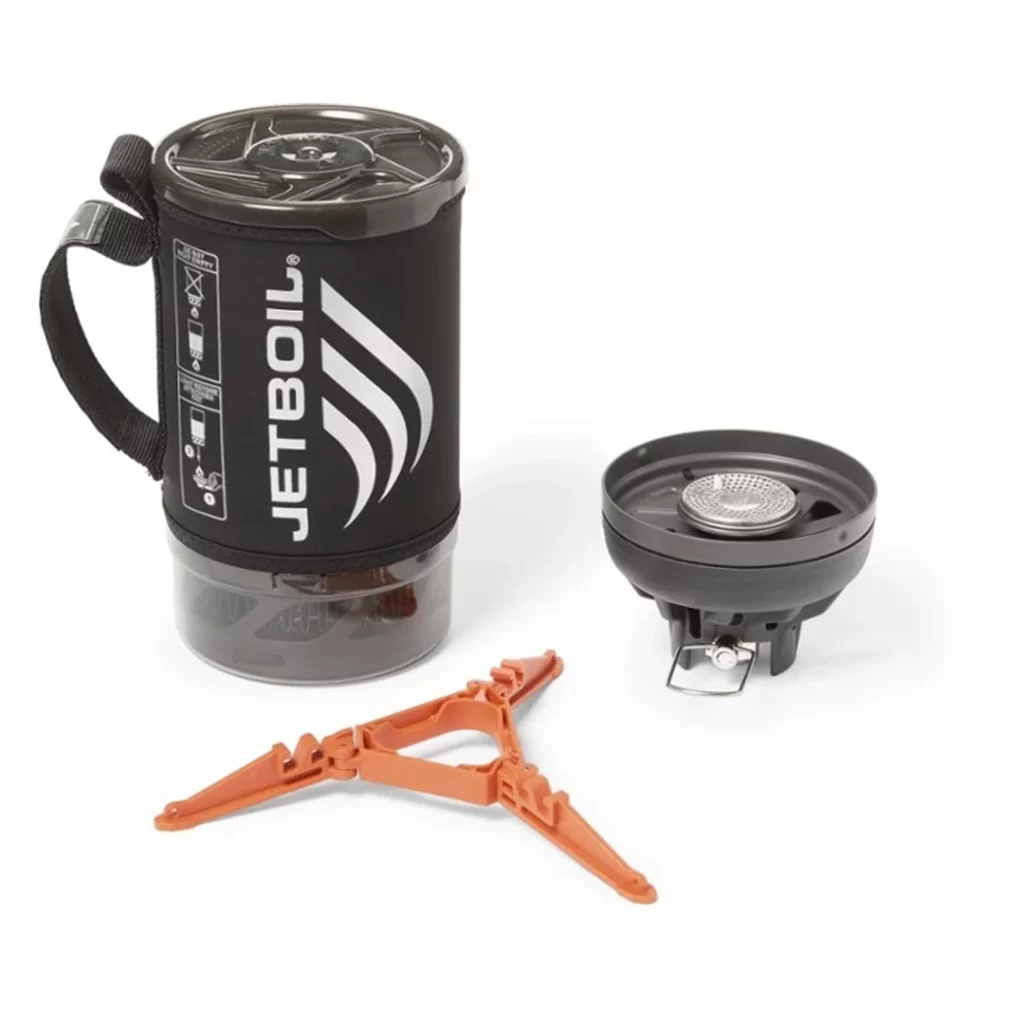
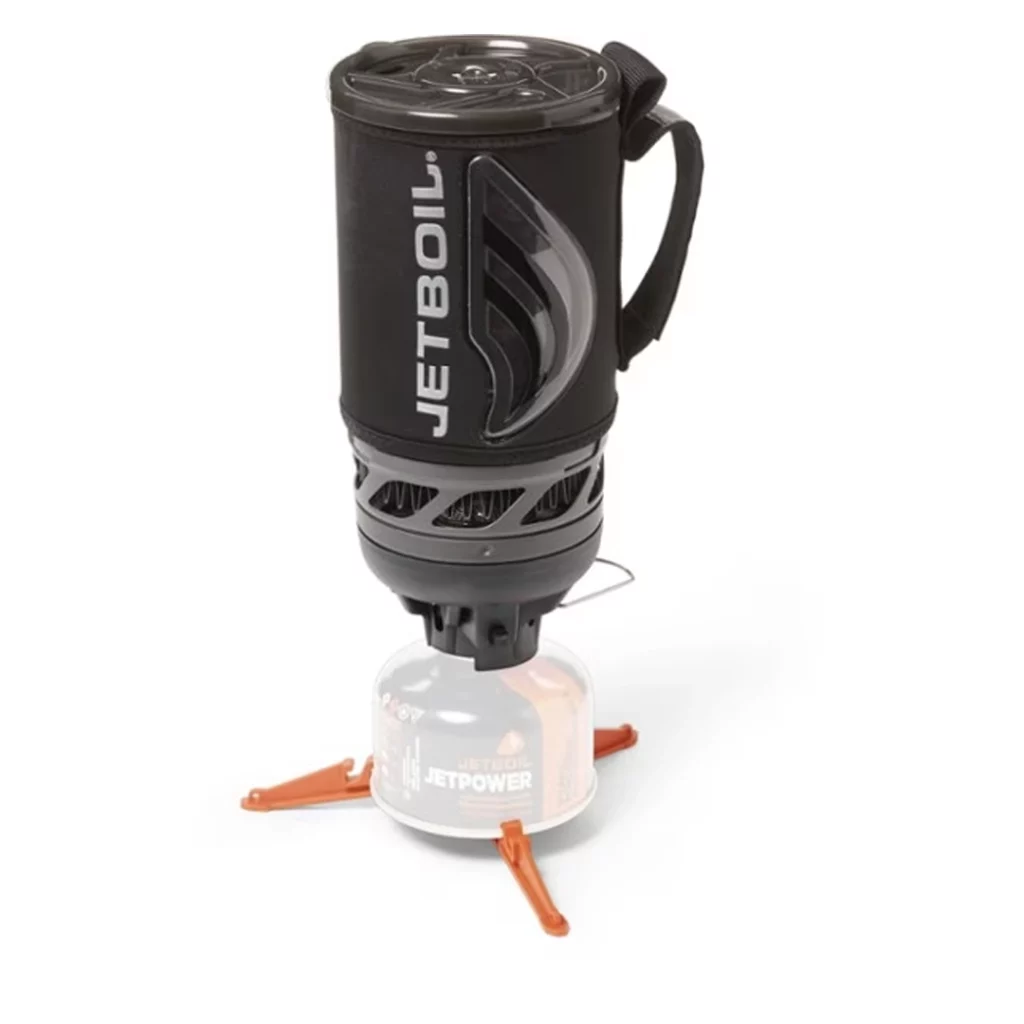
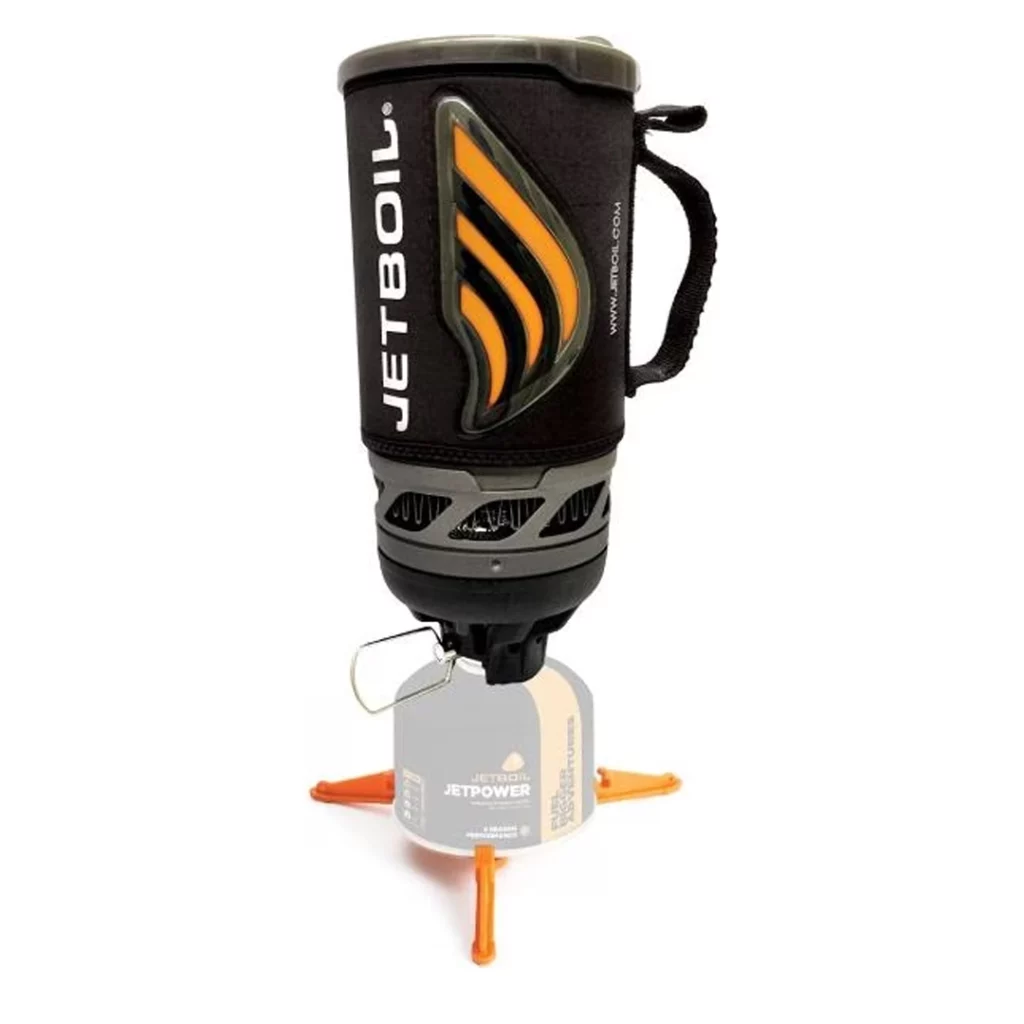
Why This Cookset: The convenience and fast boil of a Jetboil can’t be matched. No matter which model you choose, the integrated pot, pot cozy, and stove makes cooking a breeze. You won’t be able to simmer in this, and it’s not ideal for cooking food in the pot itself, but if you’re looking for the fastest water boil and a simple, relatively lightweight setup, this takes the guesswork out of combining a stove and cookset. I boil water in this, then pour it into a bag with a rehydrated meal, and with the auto-ignitor, I never worry about forgetting something crucial for those times where I’ve definitely forgotten my lighter.
If you set yourself up with these items you’ll be comfortable and prepared enough gear-wise to get started backpacking, and they’re light and durable enough to last season after season. If you can’t find some of these items or you’re looking for alternatives, just check out the specs (weight and materials) and you’ll be able to find comparable items that will get the job done just as well. Happy trails!
Essential Backpacking Gear List
Stove/cookset section has repeated info from Trekking pole section.